Wednesday, August 11, 2021

Top 5 Best Cheap XP-Pen Digital Art Drawing Tablets for Beginners


Some of the best drawings you can see today weren't created with a pencil, they were made purely on a computer. It's almost unbelievable to look at some of the drawings you can create without ever having to pick up a piece of paper.

By using a drawing tablet and computer program you can select from all sorts of different tools and settings. Choose from endless brushes including watercolour, calligraphy and even chalk. Then there are the limitless colour selections on offer.

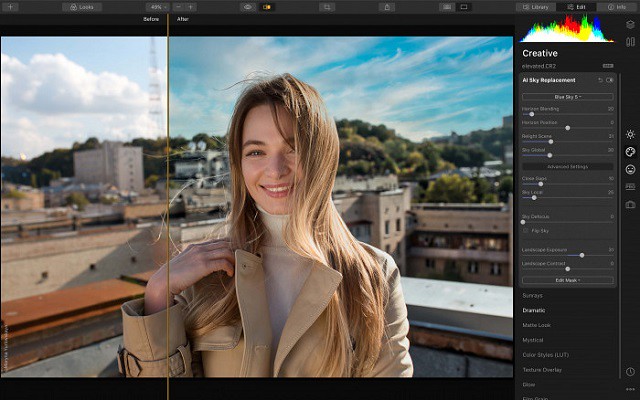
Drawing tablets can be used for most creative and content production needs such as illustration, photography, 3D modeling, animation, graphic design, etc. Most professional programs on those fields offer advanced pen support and can recognize and use pen pressure and even tilt function.

Touching the tip of the pen on the tablet surface is the equivalent of a click, while pressure and pen tilt can be used to vary stroke width, opacity, effect intensity, and other attributes. There are buttons on the pen that can be programmed for right click or other commands.

All of the drawing tablets are compatible with Windows and Mac OS systems. You can connect it to your PC or Mac and transform your computer into a drawing canvas.

If you are a graphic designer or digital artist working with a tablet is more efficient and comfortable than a mouse, especially when you use it for longer period of time. You can make illustrations and vector art in software like illustrator or digital paintings in photoshop.

They are also used for making 3D sculpted models in softwares like zbrush and blender…

Other than that there are many other uses…like if you make educational tutorials and use for online teaching then you can use the tablet to write handwritten notes. In office they are used for taking digital signatures.

The best part is, it's incredibly easy to learn how to use a drawing tablet. In no time you'll be drawing like an expert.

Looking for the Best Drawing Tablet for Beginners? If you're new to digital tablets then you'll probably be confused about all the features.

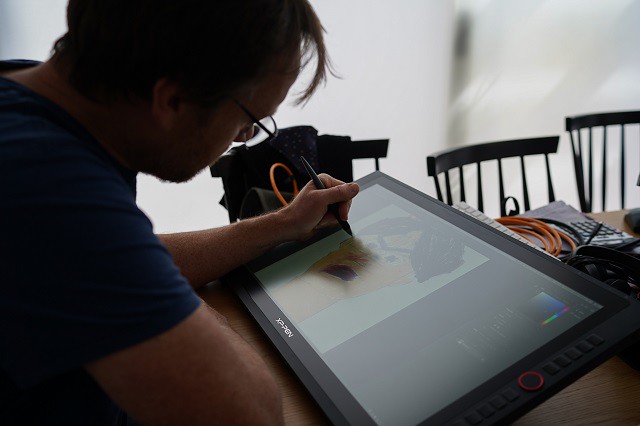
Drawing tablets, also known as pen tablets or graphic tablets, are input devices that can be used to substitute or complement a mouse. They're very popular in the graphic arts field and are considered by some as an indispensable aid for any creative professional.

While there are some technical differences, most graphics tablets work in the same way. The drawing area of the tablet creates a magnetic field, and the pen draws on this to produce its own magnetic field, which is tracked by the sensors in the tablet. Through this, the tablet knows where the pen is, the velocity of its movement and how hard the tip is being pressed against the board. It can even detect the angle at which the pen is being held.

There are two main types of tablets: displays and non-displays.

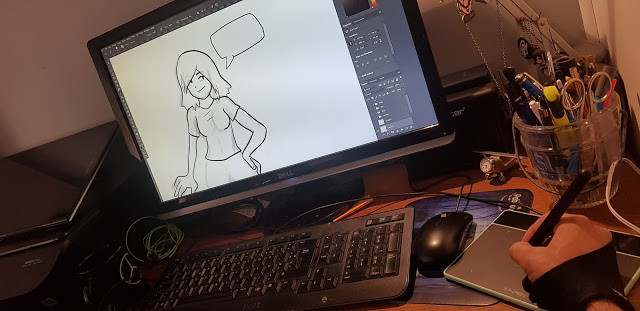
The display tablets show a screen on the device and you draw directly onto the screen.

Non-display tablets are more “traditional” drawing tablets where you draw on a black area while staring at your monitor. The strokes are recorded on the tablet and they translate into whatever software you're using(Photoshop, Krita, Clip Studio Paint).

If you're starting digital art for the first time, you should try an affordable electronic drawing pad first to see if it meets your needs. And graphics tablets with screens aren't necessarily preferable, because they're prohibitively expensive. Granted it is much easier to draw on a display tablet.

Although the drawing tablet has a screen, don't forget that it's not a standalone device. You'll still need to connect it to your computer for it to function.

Advantages of using Drawing Tablet

Many digital artists get by just fine using only a mouse or trackpad. Nothing beats having a stylus in your hand, however.

A tablet gives you complete control over every stroke, allowing you to work at length without fatigue and to condition the muscles in your hand.

Holding a pen is also much more ergonomic than using a mouse, and most users with repetitive strain injury (RSI) or tendonitis suffer less pain when using a tablet.

The pressure sensitivity, the accuracy, and honestly the natural feel of using a tablet just makes it way easier than using a mouse to try and achieve the same effects. Even a cheap tablet will make your life easier.

Graphics Tablets Price and Brands

Price varies on factors ranging from, number of pressure sensors, bit/nib options, custom stylus's, number of mappable hotkeys, and perhaps most importantly size, and brands.

So what is the best tablet brand? Wacom, Huion and XP-Pen all have a range of products for the digital artist. If you want the absolute best then a Wacom is the way to go.

The Wacom tablet is generally regarded as expensive. If you want a drawing tablet from a premium manufacturer, but a Wacom would break your budget, the XP-Pen is here to the rescue. Put simply, it is a Wacom, but at a smaller price.

XP-PEN is a professional and reliable manufacturer of graphics tablets, pen display monitors, stylus pens, and other intuitive interface devices.

Nowdays the brand wacom , Huion and XP-Pen are all offers battery-free pen with each Drawing tablet. The pen doesn't need batteries, so it's lightweight, perfectly balanced and comfortable enough to use as long as you like.

What to Consider Before Buying drawing tablet without screen

If you feel the need to, you can learn about the fundamental differences between different kinds of non-screen drawing tablets and other useful information.

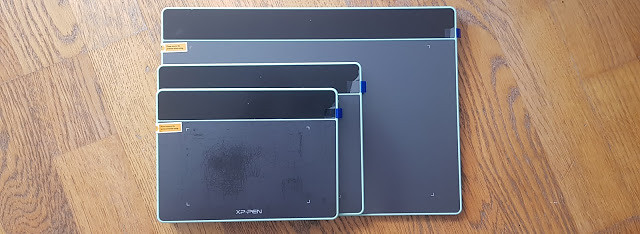
1. Size of the Active Drawing Area: The active area is where you draw, sketch , edit and it's mapped exactly to your display. The active area should not be confused with tablet size. The tablet usually contains the toolbar and the various menus.

Tablets usually come in sizes where the active drawing area ranges from slightly smaller than an A6 page to slightly larger than A4.

working area sizes should be relative to your screen size and resolution. The smaller the tablet surface, the less hand movement will be necessary to move the cursor on the screen.

Having a tablet too small for your screen leads to a jumpy cursor and makes fine selections difficult. A tablet too big for your screen feels slow, requiring more hand movement, and may tire your arm muscles quicker.

Drawing tablets come in a range of different sizes, and this component is a very personal one. Some artists prefer a large surface area for their creations, while others like to have a compact and travel-friendly option.

2. Pressure Senstivity: It's possible to find a drawing tablet that ranges from 2000 to 8000 pressure levels. Generally speaking, the higher the sensitivity, the easier it'll be to manipulate while you're drawing.

These sensitivity levels allow a greater connection to occur between your tablet and the stylus. If you end up with a particularly sensitive product, you'll be able to create thicker lines as your press down harder on your pen.

3. Tilt support: Higher-end tablets also offer tilt sensitivity, where they can track the angle of the pen and use this to vary the thickness and intensity of the line – ideal for sweeping brushwork or interesting calligraphy effects. The manufacturers will usually specify the level of tilt sensitivity; 60 levels means it can track 60 different degrees of tilt.

Required to correctly simulate the shapes of natural brushes, making it a must-have feature for illustrators working in programs that simulate natural media. Tilt gives much more natural results in those cases.

4. Resolution: If your work involves designing highly detailed images, a higher LPI index is what you should look for. A higher LPI implies significant sharpness and greater detail.

The resolution of a tablet is measured in LPI or lines per inch which is a means for measuring print resolution that utilizes halftone screens. Halftone comprises dots that are similar to DPI resolution (dots per inch) in digital printing.

Current pen tablets offer really high resolution and even the regular XP-Pen Star can handle large resolutions with excellent cursor precision.

5. Reports per Second: Reports per second or points per second refer to the number of times a tablet notifies the computer every second your pen or hand is on the surface of a tablet.

A faster or higher points per second imply the tablet is better and more responsive while a gadget with slower or lower points per second implies a poor and less responsive device.

A drawing tablet with a high response can create smoother lines while low response gadgets create jaggy lines.

6. Shortcut Keys: Hotkeys are also crucial when it comes to choosing a drawing tablet. Most of these gadgets incorporate functional keys that are programmable in accordance with your needs.

Some models will include keys around the graphics area and have keys on the pen. tablets that have these functional keys will help save time, making it possible for you to utilize shortcuts and reach your favorite settings.

7. Wired or Wireless Connect: Wired drawing tablets do not give you the freedom of movement that wireless tablets do. The choice between a wireless and a wired tablet depends totally on your requirements.

That's fine if you're keen to avoid cable clutter or work with a laptop where ports are in short supply but you'll either have to keep the tablet stocked with batteries or plug it in for an occasional recharge.

8. Stylus: The stylus is a digital pen. Its purpose is to create a real pen/pencil-like experience for the designer. There a majorly two kinds of styli: battery-operated styli and Electromagnetic Resonance or EMR styli.

An EMR stylus uses less power and has a thicker point for drawing. Battery-operated styli, on the other hand, have a thinner point, which increases their level of accuracy.

What to Consider Before Buying Pen Display Monitor

Pen displays are coming in at the high-end of the market and these effectively combine a graphics tablet with a secondary screen.

The big plus is that you can see what you're working on as you're drawing on the drawing surface – a bit like when you're drawing with pencil or ink and paper.

Also, you can have reference images or toolbars open on your main screen, then keep the tablet screen clear for working.

1.Screen Size and Aspect Ratio: The screensize is the physical measurement diagonally of the screen in inches. 1 inch (also written as 1") is equal to 2,54 cm

screen aspect ratio is the ratio of its width to its height. Every screen has an aspect ratio associated with it. A few of the most common aspect ratios we see today are 4:3 and 16:9.

the 16:9 ratio is considered the international standard format for television, cinema, and major online streaming platforms.

2. Screen Resolution: Screen resolution is a measure of how your monitor or screen displays an image; it essentially refers to the clarity of the content on your screen.

Resolution usually shown as something like “1920×1080”, which means there are 1920 pixels across and 1080 pixels down.

the most commonly used 16:9 resolutions across pen display tablets:

HD 1280 x 720
FHD 1920×1080
2K QHD 2560×1440
4K UHD 3840 x 2160
5K 5120 × 2880
8K 7680x4320

If you are looking at two screens of the same size, the content on the one with the higher resolution will appear sharper and clearer.

At very low resolutions, images might look “pixelated” or have jagged edges, because there are not enough pixels to provide a crisp, clear image.

3. Screen Color Gamut: gamut refers to the range of colors available in a given monitor, or application. Note that the range refers to the difference between the colours, not the number of colours. The 3 most commonly known quantifiable color data might be sRGB , RGB and NTSC.

sRGB is “standard Red, Green, Blue”, and is the industry standard pretty much entirely, throughout the world, for everyday application. It's got a smaller range of colours than Adobe RGB. It's used in almost every app, web browser, and design tool you use every day, and has the bonus of helping maintain consistency over all platforms.

Adobe RGB allows for a higher range of colours, or colour gamut, over the same number of colours.

Obviously, the higher colour range is desirable for print and production, allowing you to be far more accurate with your colours than you can with sRGB. It can also be converted to sRGB down the production line, making it a little more reversible than the former.

Another common standard of colour space is the NTSC gamut – 72% NTSC = 99% sRGB. Therefore, a display that can reproduce more than the standard 72% NTSC will deliver even more vivid and true-to-life colours.

4. Panel Type: The panel determines how good your monitor is. the three main ones is TN , VA and IPS.

TN panels (Twisted Nematic) are the cheapest ones and the most widely spread because of their affordable prices. Sure, they have fast response time but the colors and viewing angles are quite poor on this panel which will distort your perspective on your designs.

VA panels (Vertical Alignment) are the midrange choice though they aren't very popular. Price-wise they are significantly more expensive than the TN ones ( they are way better than TN panels ) , but when it comes to their performance, they aren't good enough to justify their price.

IPS monitors (In-Plane Switching) are your best choice when it comes to price versus performance. They are usually a bit more expensive than VA panels but the difference in performance justifies it. You'll get accurate color rendition, great viewing angles and a faster response time.

5. Contrast and Brightness: Contrast ratio is the ratio between the maximum and minimum brightness, or in other words, the ratio between the brightest white and the darkest black. For example, a contrast ratio of 1000:1 means that the brightness of a completely white image is 1000 times greater than the brightness of a completely black image.

Projectors with a high contrast ratio, such as 3,000:1, have darker black levels than projectors with lower contrast ratios, such as 1000:1. A higher contrast ratio also produces images with more saturated colors since the difference between black and white is greater.

Brightness is a measurement of the amount of light the LCD monitor produces. It is given in nits or one candelas per square meter (cd/m2). One nit is equal to one cd/m2. Typical brightness ratings range from 250 to 350 cd/m2 for monitors that perform general-purpose tasks. For displaying movies, a brighter luminance rating such as 500 cd/m2 is desirable.

6. Viewing Angle:When you look at an LCD monitor from an angle, the image can look dimmer or even disappear. Colors can also be misrepresented. To compensate for this problem, LCD monitor makers have designed wider viewing angles.

Manufacturers give a measure of viewing angle in degrees (a greater number of degrees is better). In general, look for between 120 and 170 degrees.

7. Parallax: When drawing on a graphics tablet, the stroke doesn't always appear directly under the pen as viewed by the user. Parallax is the distance between your pen tip and where the stroke appears on your tablet's screen.

The thicker the glass, the further away your pen will look. That can cause a slight discrepancy in what you draw, so you'll need to get used to it.

The lower the parallax, the better your drawing experience. Some tablets like XP-Pen Artist Pro have laminated screens, which can almost entirely prevent any parallax.

8. Matte vs Glossy Monitors: The screen texture refers to whether the screen feels matte, smooth, shiny, etc. Many tablets try to replicate that authentic pen-on-paper experience. By creating a little friction between the pen and screen, you get more feedback as you draw. It all comes down to personal preference!

5 Best XP-Pen Drawing Tablet for Beginners

Have you ever wished that you could get professional photo editing or graphic illustration results at home?

These five tablets offer a variety of professional tools that can edit, create, and upgrade your digital photos and illustrations.

From skilled users to beginner editors, these tablets can get you started and make your projects come to life.

1. XP-Pen Star G430S / Star G640

The small tablet has a drawing area of 4 x 3 inches ( Star G430S ) / 6 x 4 inches ( Star G640). It's thin, light, and portable, which are all important factors if you want to carry it around. The included pen is battery-free and has 4096 levels of pressure sensitivity.

It's compatible with Photoshop, Adobe Illustrator, and much more. XP-Pen does include some extra nibs in the box for the pen.

This tablet has a smaller active area, which is ideal for playing OSU. it allows you to improve your gameplay. You'll have better accuracy and faster responses!

The XP-Pen Star G430S / Star G640 drawing tablet is the cheapest good drawing experience you can get. if you're on a very tight budget, this will get you started off till you can afford a better tablet.

2. XP-Pen Deco Fun XS/S/L

XP-PEN Deco Fun series are available in three sizes XS ( 4.8 x 3 inches ) / S ( 6.3 x 4 inches ) / L( 10 x 6.27 inches ) and four colors: classic black, space blue, apple green, and carmine red, to meet your personal preference.

the battery-free pen designed with EMR technology adds to your convenience of editing or drawing whenever you want. Its 8K pressure sensitivity and tilt recognition ( XS version not support tilt function ) delivers advanced performance and realistic pen-on-paper feel.

Apart from drawings, you can also use this drawing tablet for whiteboard demonstrations, document annotation, photo editing, and more. compatible with your Chromebook.

XP-Pen Deco Fun is designed to make learning easier. Use the digital pen and tablet with your computer to draw , write formulas and interact in online classes in a more natural way.

3. XP-Pen Deco 01 V2 / Deco Mini7 / Deco Mini7W ( wireless)

If you've already made some progress on your journey as an artist, and are looking to upgrade to something a little more professional, then the XP-Pen Deco 01 V2 / Deco Mini7 / Deco Mini7w is a great option. It has great build quality, accuracy and precision.

The tablet comes with a bigger working space ( Deco 01 V2: 10 x 6.25 inches , Deco mini7 / Deco Mini7w: 7 x 4.37 inches ) , so you get more area to draw and design.

Coming to the features, the drawing tab has 8 programmable shortcut keys, so you can erase, adjust the brush size, and can do a lot of things just with a click.

The Stylus feels nice in your hand and will wow you with how responsive it is. You won't notice any lag as you draw, and it also has tilt recognition.

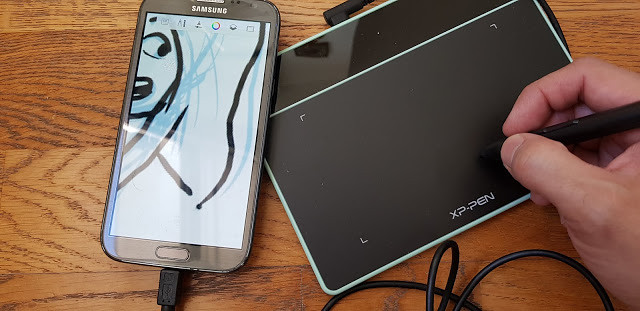
You get an OTG connector inside the box for connecting the XP-Pen Deco 01 V2 / Deco Mini7 / Deco Mini7w drawing pad with your Android Phone /Tablet.

4. XP-Pen Artist 12 Pro / Artist 13.3 Pro / Artist 15.6 Pro

The display drawing tablets aren't really aimed at beginners. But lots of people are much more comfortable with the idea of stylus-to-screen drawing and painting.

The 3 tablets of XP-Pen Artist 12 Pro (11.6 inch ) , Artist 13.3 Pro ( 13.3 inch ) and Artist 15.6 Pro ( 15.6 inch) are consistently a best seller ! all of which are the best display tablet for beginners with a simple design, a built-in stand, and a very simple setup process.

All the specs are incredible with a 1080p fully-laminated display, 88% NTSC color accuracy ( Artist 12 Pro : 72% NTSC ) , 8 express keys, Red dial and a battery-free digital pen designed to last for years of consistent use.

The stylus performs very well which has a tilt function of +/- 60 degrees, and is equipped with 8192 levels of pressure sensitivity.

the XP-Pen Artist Pro series is more than capable of creating professional art. The drawing monitor has a quick reaction time that does not inhibit you in any way.

5. XP-Pen Artist 22 (2nd Generation)

A drawing tablet without a display won't appeal to everyone. There's nothing like seeing your artwork in full and vivid color on the screen you're drawing on. And the XP-PEN Artist 22 (2nd Generation) is one of the best drawing tablets with a screen that won't break the bank.

Despite being affordable, this tablet doesn't disappoint. It has a display with an excellent resolution ( 1920 x 1080 ) and a wide color gamut ( 86% NTSC, Adobe RGB≥90%, sRGB≥122%). So, your illustrations will look vibrant and realistic on this screen.

The 22inch FHD screen gives you a lot of screen space, so you can see the minutest details of what you're drawing.

The battery-free pen is amazing to use ( Artist 22 Pro and Artist 22E Pro comes with a P02S Rechargeable stylus ) – responsive and smooth. Tillt recognition also allows you to control the line thickness.

You can draw with precision and shade with ease, thanks to the 8192 pressure levels.And with a ≥ 220 PPS report rate, it's speedy with no lagging or delays.

Before you buy this tablet, make sure that your computer has HDMI and USB-C ports. Otherwise, you'll need to buy an extra adapter for your tablet to work.

If you want to upgrade from a non-screen graphic tablet, the XP-PEN Artist 22 (2nd Generation) is an excellent choice. It's also ideal as a first drawing tablet monitor due to its great features and low price.

Conclusion

A drawing tablet will open up new opportunities for creativity and self-expression. You can enjoy digital art as a hobby or even a new career path.

There are plenty of options out there for you if you're just starting your journey as a digital artist and are looking for a proper graphics tablet.

All of the above options are great to start off with, and will help you launch your career. The important thing is to take that first step. Until next time, happy drawing!

Don't forget to share these recommendations with your friends if you like it. Still, if you are in doubt then do leave a comment down below I love to solve all your queries.

Source: https://www.xp-pen.com/forum-2376.html

Friday, June 11, 2021

Hands On Review of the the XP-Pen Deco Fun: XP-Pen's Most Affordable Drawing Tablet


With a graphic tablet you can draw on your computer! Your screen will turn into your canvas.

If you do any type a graphic design, digital design, digital art and marketing graphics there will come a time that you will need some new equipment to take your skills and abilities up a notch. I highly recommend XP-Pen products.

Graphics Drawing Tablets for PC have come a long way in recent years. Gone are the days where the only game in town was a Wacom Intuos. Now, there are options to suit all budgets – from powerful, feature-packed pen displays with high-resolution touchscreens, to mid-range and cheap drawing tablets that balance price with power.

XP-Pen was founded in 2005 and in my opinion, whether you're interested in painting, drawing or photograph retouching, it is the company you should consider when looking for a graphics tablet.

Recently, XP-Pen introduced a new addition to its Deco family: the XP-Pen Deco Fun with XS, S, L three sizes and four different colors. Since I've been a XP-Pen tablet user for many years, I couldn't wait to get my hands on it.

The first thing I noticed was that XP-Pen now offers a bewildering selection of entry level and mid range tablets.

These “entry level” tablets are the XP-Pen Deco Fun Series. Prices vary because their sizes vary by tablet. They feature a smooth drawing surface and Android compatible with Android, Chrome OS.

For my tests, I bought the whole models of the Deco Fun range.

Unboxing the XP-Pen Deco Fun

When I first got it I was really excited because I'd seen on Youtube all the unboxings and the interior of the box is really nice!

It's a beautiful box for storing your tablet in! Underneath the tablet is a compartment for the cable, that connects it to your laptop, and the manual.

Once you buy it, you'll get:

– The actual Tablet .
– The pen with buttons .
– 1 Pen Clipper and 10 extra nibs
– A booklet containing information on the tablet
– a USB connecting cable

Models

There are three versions of the Deco Fun. The price depends on the size you get too, obviously the bigger, the more expensive.

Extra Small ($29.99) — This tablet works well for those looking for an ultra-portable design as it measures 182.4 x 134.7 x 10.5mm.

Small ($39.99 ) — This size is my personal preference at 210.5 x 159.8 x 12.9mm. This matches my laptop well and easily fits in the bag for on-location work. Its large enough to use comfortably at a desk.

Large ($49.99) —This size works best for illustrators or those with a large work area. It measures 315 x 222.9 x 12.5mm.

Info & Features:

Here is some information and features about the tablet:

– The tablet has no buttons on the side to customize .
– There are additional 2 buttons on the pen.
– you can connect the tablet with its USB-C to USB-A type cable.
– The XP-Pen Deco Fun has also great pen pressure sensitivity.
– It has about 3 sizes and four colors ( Classic Black, Space Blue, Apple Green, Carmine Red ) to choose from.
– The small and Large Size tablets do have tilt feature.
– tablets supports Window , Mac , linux , Android connection and is widely compatible with Chromebook devices.

The Deco Fun is a simple entry into pen and tablet-based photo editing and illustration on a budget. While not as large as pricier options, and serving only as a map of the screen and not an actual screen, the Deco Fun' pressure sensitivity simplifies and speeds up many types of brush-based work.

Here's the official website for the XP-PEN Deco Fun: https://www.xp-pen.com/product/905.html

Install the Driver

Getting used to the tablet also involved getting the hang of how the pen worked on the tablet's surface. Much of this was made flexible via the tablet driver.

Once you have your tablet, you need to install all the drivers so it all works properly, which is a very simple task to do and shouldn't take up a lot of time.

Just Go to the XP-Pen official site drivers page. Click Download next to the latest driver that corresponds to your computer's operating system. Follow the prompts to finish the driver installation.

The Driver will help you to make relevant modifications on pen pressure to helping it feel akin to an actual pencil.

Tech Review

The tablet surface corresponds to your computer monitor; moving the pen over the tablet is analogous to moving your finger on a track pad — the movement is in your hands, but your eyes remain forward, looking at the monitor. While it sounds less intuitive than drawing directly on the screen, in practice it feels natural.

Made from smooth black plastic similar in feel to the Touchpad on a Laptop, the XP-Pen Deco Fun should look right at home on most desks. The majority of the tablet is taken up by that work surface, which measures 6.3 by 4 inches on the small model .

Four rubber pads underneath provide grip to carry the tablet steady while you're working. While constructed from plastic, the Deco Fun feels well-built for the price. I did find that with enough use, the pen will leave tiny scratch marks in the surface of the tablet .

Use the Deco Fun feels like the you tried to type without looking at your hands. Watching the screen instead of your hand while drawing feels strange, at first, but that odd feeling slowly fades the more you use the tablet system until it feels just as easy as typing.

In fact, employing a separate tablet and monitor — versus drawing directly on a screen — may even be a plus, as your hand doesn't physically block your view of your digital canvas.

My experience with it

Digital Painting experience

After installing the XP-Pen Deco Fun, I began exploring the digital medium landscape by trying out the paid software offer of Photoshop CC , alongside various other different free software including Medibang Paint, Gimp ,Krita, etc.

The bundled software ( ArtRage Lite ) doesn't do much for me . I think it's better to buy a Deco Fun and then buy whatever software you want to use with it.

The drawing surface is awesome: slick and smooth with no skips or lag. XP-Pen has always made quality tablets so there's no surprise that the pen responsiveness is spot-on.

The product does have its downfalls, The real difference between this tablet and its predecessors (and other tablets in XP-Pen's lineup) are the customizable hot buttons down the side of the tablet.

you can using it replaces drawing paper, pencils, watercolors, and just any other art tool you could think of!

A lot drawing programs are free, so once you get a tablet, you are essentially ready to go.

Since tablet stylus acts just like a pen, paintbrush, or whatever you want it to be, the table itself senses pressure. The biggest edge the Deco Fun has over a mouse is the pressure sensitivity.

More pressure creates smaller, darker strokes, while less pressure creates a line as large as the selected brush with more edge gradient. The pen doesn't mean you never need to choose a brush size, shape, or edge again, but the pressure sensitivity allows you to urge that maximum brush size or just a fraction of that selected brush with light pressure.

This makes it so that when you press hard, the lines made are thicker and darker, just like in real life. You can easily draw and color like you would on regular paper, except with more tools that you couldn't use in real life.

Use Deco Fun Graphic Tablet to Edit Photos

The main benefit to a tablet when photograph retouching is not as obvious as you might think. The precise movements compared to a mouse are nice but actually being able to change pressure on the pen is equally as useful, especially if you are dodging and burning.

While the Deco Fun is the most time-efficient when using the pressure sensitivity, the tablet-based editing feels more natural for a number of other uses. Using the pen to tap out blemishes with the healing tool was slightly faster than using the mouse, but it also felt more natural and, frankly, helped me in making a tedious task a bit more enjoyable.

If you think you'd be better/faster with a tablet, you should seriously consider getting one. Illustrators, cartoonists, animators, photographers doing retouching/editing by mouse would all benefit from a tablet.

I use the pen stylus even for video editing. Period point blank, holding a pen is going to be more accurate and efficient rhan holding a mouse for any computer task you can think of, at least for me.

Works with Chromebooks

This entry level tablet connects to any Chromebook with a USB cable and then you use the included stylus to draw like you'd normally draw! I've used a similar product from XP-Pen before to draw out math equations and it worked really well.

Supported on Chrome OS 88 and later, and Kernel version 4 and later(including 4.4, 4.14 and 4.19).

If your Chromebook has a touchscreen, the lag on some of those can make drawing accurately nearly impossible.

There are plenty of drawing apps for Chromebooks . You could use this for art (obviously) but also for students who want to show their math work.

This most likely has very little lag and the price makes it very affordable to boot.

Also when you buy the deco fun tablet you will get the three-month trail of Explain Everything whiteboard app ( just like Google Jamboard , Openboard and MS Whiteboard ) license .

Just download the app on your device to use to draw and open the board in a browser to screen share (or just send them the share link to view) and they can see what you draw.

I've been using the xp-pen with OneNote and PowwrPoint and it's worked great. You get used to coordinating the pen with the screen pretty quickly. it's great for online courses .

Support connect to your Android phone or tablet!

you need to download a driver to your pc and connect the tablet to update the tablet's firmware . after that its suppoused to work as intended.

It doesnt work with bluetooth it has to be connected using usb otg ( not come with , you have to buy one by yourself ) .

I connected my XP-Pen Deco Fun to my Samsung Galaxy (my phone came with a special adapter) and it technically works. However, you can't see where the pen is but you can still click and draw.

inixPint X this one support pen pressure and Sketchbook are my favorite apps . also with also medibang paint and adobe sketch ( idk why those 2 dont support pen pressure , But you can still draw. ).

Conclusion

The XP-Pen Deco Fun is the perfect tablet for anyone to start their journey in the digital medium. The added bonus of the free software, and relatively cheap prize makes it a perfect comic for the budget artist.

If you're looking at buying a Drawing Tablet, I definitely recommend getting a XP-Pen Deco Fun. For a beginner, it's perfect, not difficult to use and great results.

I'm thrilled with it and happily using it to sketch and paint in Photoshop.

If you do a lot of retouching, photography editing or even drawing, you should buy one, in my opinion. It's a solid product with minimal problems.

If you draw a lot, I would consider a XP-Pen Artist 12 Pro Drawing Tablet With Screen . I do not think you'd benefit from a screen with photograph retouching, so I do not recommend getting the more expensive model if you're only interested in photography.

Friday, June 4, 2021

7 Best Software for drawing illustrations and manga digitally


Hi guys! I write about art resources and tutorials and I think letting more people know about free art programs decreases the barrier to entry in the creative fields, so here is the full text from a round up on free art programs.

Let me know in the comments if you have a favorite you'd like me to add! Hope this helps somebody!

Paid software often is the industry standard and there are many amazing options there too.

Out of the plethora of free digital art software available, these are my favorite picks for free drawing software, including a few open source digital art software projects.

What Is the best digital art program to start with?

The question everyone seems to have an opinion about, but instead of opinions let me give you one well known fact, digital drawing software tends to be super complicated : open up Adobe Photoshop for the first time and you will have no idea what to do because there are just too many choices, most of which are btw completely irrelevant to a digital artist, especially a beginner.

Krita, a commonly recommended starter software that I myself in fact started with, has the same issue and corel painter is certainly no easier. Medibang and firealpaca are also quite bloated with features but not as far gone as these others I've named.

I've tried almost all digital painting software I could find on the internet, so with that said here are my winners for best beginner software, and my logic for recommending them.

I can name some really-well known ones and I'll say my own personal opinion about them.

7 Best Digital Painting and Drawing Software

1. Paint Tool SAI

Works on: Windows Only | Price: $50~

Personal opinion: The most beginner friendly general purpose painting software with a bite stronger than it's bark. Also possibly the most lightweight painting software .

I know it's not exactly dirt cheap (pretty cheap though) but trust me when I say that for a beginner this is a worthwhile investment if only to streamline your learning experience and ease you more gently into the digital drawing experience.

The reason I recommend this as the ultimate software for a beginner digital artist is simplicity, this program is very much straight to the point and doesn't have any features or weird unexpected buttons you won't know what to do with.

the entire program is centered around painting and only painting and doesn't allow itself to get bogged down or overcomplicated by including features that not everyone would use, it has a clean and simple, intuitive user interface, making it easier to learn than all other digital painting software of comparable capabilities.

there are many great artists who use this software professionally so don't be fooled into thinking it's only purpose is to be your training wheels, you could end up loving it for decades .

It also helps that it's cheap with a 1 time payment of $50~ as opposed to say $10 a month for photoshop which would fast accumulate to $120 per year.

This program has a simple, to the point user interface, simple yet solid and fast brush engine, it is tried and tested, has been around and loved by it's users for years, it is lightweight and feature complete, it is the perfect starting point for any first time digital artist.

2. MyPaint

Works on: Linux, Windows and MacOS | Price: Free And Open Source!

Probably the most grounded in simplicity from the first line of code to the last, this program was made with beginners in mind and many advanced artists swear by it as their go to tool for quick painting and sketching purposes.

MyPaint is a bit of an underdog, I've seen a handful of people swear by it and at a glance after you first open it it would seem like it's simpler than the above two... But it has a major flaw, the default UI setup is ridiculous, so unless you have the patience and know-how (e.g. to know that this is what you want) to set it up something like this yourself manually, this is one of those programs where you will just open it up and have no freakin idea what to do not because there are too many buttons, but because there are too few .

I also noticed that the download links can be a bit wonky and you have to manually select the 32 bit or 64 bit installers when you download (if in doubt, select the 64 bit/w64 ).

This program is perhaps the only one that was effectively designed in such a way that you can just open it up and paint, no hassle, from the moment you open it you have an infinite size canvas to work with, in other words you don't have to worry about setting your canvas size, it's already "as big as you need" without getting into any technical details :la: and I find that neat.

It's really not that hard to set up, in fact I'll walk you through it.

Open the "Window" menu at the titlebar

Now click the following in this order:
Preview Panel
Color Adjusters -> HSV Square
Layers Panel
Brush Groups -> Classic
Tool Options Panel
If everything goes well, the first 3 should be on the right side of the screen and the last 2 on the left side and now you have a perfectly solid UI. If however something went wrong, you can drag these panels around by clicking and holding the icon in their upper-left corner .

After setting this up and playing with the classic brushes you can start exploring more of the program and set up things like the "Favorites" Brush Group, creating your own Brush Groups and even creating your own brushes : just make sure you always select the "Freehand Drawing Tool" (aka brush tool) in the top menu bar.

Also be careful not to go too crazy on the zooming out, you'll end up with a humongous file hehe Sweating a little... (takes forever to save, and brushes will get slower if you make them too huge; note that this issue affects all software, not just MyPaint ).

3. Medibang Paint or FireAlpaca

Works on: Linux, Windows and MacOS | Price: Free

While the UI design could be better, these programs are very well rounded general purpose drawing software with a very to-the-point feature kit and a hard to beat $0 pricetag!

MediBang is a relatively recent addition to the free software list, it started out originally as a program called OpenCanvas, MediBang as well as FireAlpaca and Jump Paint (a medibang derivative) are all effectively just 'lite' versions of OpenCanvas.

FireAlpaca has animation support while medibang has some manga-creation features instead and Jump Paint is a customized version of medibang tailored towards mangaka and also has lessons on how to create pro quality manga by JUMP's editorial department : so if that's something you want then yeah, maybe go for Jump Paint instead of MediBang, that's bound to be some valuable data for you .

MediBang and FireAlpaca don't do as good a job of being simple and to the point as my former 3 mentions, I'd say their UIs are rather unintuitive in comparison, but it's certainly simpler than most other alternatives, so there's that.

MediBang or FireAlpaca would be a good starting points but their learning curve is steeper than of the above programs , and not due to how many more features it has but more due to poor design choices.

however on an Android Tablet PC MediBang may possibly be the best choice you have, the only other option I know of would be (Corel) Painter Mobile (which is free but you need to pay a little for their brush engines, which is kinda retarded since it's the main part of the program but it was pretty cheap so meh, I really really liked painter mobile's sketch brush engine ) but MediBang is still a very sold program.

So is FireAlpaca and I assume so is Jump Paint but the full experience is only available in OpenCanvas .what a confusing series of programs.

4. Krita

Works on: Linux, Windows and MacOS | Price: Free And Open Source!

The current king of free painting software, it is by far the most feature rich free painting software, it's open source, and does it's best to compete not only with photoshop but also corel painter, it sadly does not fully beat either of them at their own game, but instead it beats both by offering features that corel painter doesn't and offering brush engines of superior versatility to Photoshop's.

This program has room to grow and there's no telling if in a few years it'll be the next digital painting behemoth, or the next digital painting vaporware. It could afford to be more noob friendly though and lacks the capabilities to do clean rendering .

I used Krita because as a painter I preferred it over photoshop : but ultimately found some problems in how it handles soft brushes and blending with them .

Krita will again be a solid alternative for me, and even without this, for rough painted looking styles Krita is rock solid, and no program besides photoshop that I'm aware of can beat Krita in post processing and image manipulation tasks. so Krita is undoubtedly one of Photoshop's by far strongest competitors.

if none of the previously mentioned programs sounded like a very good fit, either you need to look at vector illustration software or this is probably the right fit for you. It has many cool brush engines but overall I'd say nothing that really stands out (it's sketching brush engine is sublime tho) compared to formerly mentioned software.

Krita also has animation support and some minimal vector drawing capabilities as well as some manga/comic illustration features, besides photoshop it's basically the only "all-in-one" package software, and... it's free!

It's loaded to the brim with awesome features but it is definitely not noob friendly, so unless you have a background in Photoshop or GIMP, there is going to be some degree of learning curve here.

5. Adobe Photoshop CC

Price: $10+ per month/$120+ per year | Works on: Windows and MacOS

There are two quite heavily disputed champions leading the industry of digital artwork, those are Corel Painter and Adobe Photoshop. In my personal opinion the only one of the two that deserves to be called a champion of anything when it comes to digital art is Corel Painter, but nontheless I can't argue with the general consensus too much about photoshop's less disputed dominance over the market.

The best image editor, photomanipulation and post-processing software but with lackluster painting capabilities for it's price (it's brush engine while pretty nicely optimized, has too few customization options in my opinion).

Probably the most widely recommended digital painting capable software on the entire internet, used by professionals all around the world, personally I preferred Krita as while Photoshop's brush engine may be better optimized it's also less feature rich.

But photoshop has reigned supreme since the 90s for a reason, even if that reason may only be because it reigned supreme in the 90s, it is however the completely undisputed champion of photo editing and manipulation . and many photomanipulation and post-processing techniques that are often more easily achievable in photoshop than rivaling applications are indeed potentially useful for many of the more advanced digital artists, which is why a lot of artists end up working with 2 programs, i.e. their favorite painting application (commonly this is corel painter) and after finishing up there they copy the image to photoshop for post-processing and final refinement .

but there's no denying that this program is quite expensive in the long run. However there's also no denying that this is the most tried and tested program and most professionals by far use it, so you can't go wrong with this program as an intermediate-advanced digital artist, that's for sure.

6. Corel Painter

Price: Over $430 + $200 yearly for updates (Has Free Trial)| Works on: Windows and MacOS

The most expensive digital painting program there is, also quite possibly the best program ever for digital painting, with multiple super advanced brush engines, you can usually find a way to make the brushes behave exactly how you want in this program which is the key to any digital painter's ultimate success.

Is it just me or is that price so stuck in 2001 that no sane person that's not already a regular customer would EVER buy it in the modern market?

Even Adobe upgraded their pricing strategy, but here corel sits stuck with it's head up it's ass thinking it's still the only program in the world competing for the "professional digital painter" title, which given the large list of programs both above and below this line is obviously not the case Disbelief .

But there's a reason for this price because even if this may no longer be the case, ever since the freaking 90s up until the mid 2000s this was indeed the one and only program professional grade software targeting digital artists in the whole god damn world . the only digital painting program besides photoshop (and maybe the now pretty much dead GIMP) worth taking seriously.

But unlike photoshop they weren't having any of that "image manipulation" bullshit, no their goal was to create a real, lifelike painting experience in the digital space and they got pretty damn close, with probably the best collection of brush engines the world has ever seen . this digital painting software is an industry standard for a good damn reason.

this may very well be the best digital painter's software on the market, But Corel needs to get with the times or get lost in my opinion.

7. Clip Studio Paint

Works on: Windows and MacOS | Price: $50/$220

Simple and elegant, quite likely the best software for manga and comic book creation, and painting in simple/cel shaded styles.

Previously known as manga studio, this little gem woulda probably made my top beginner friendly software list if it wasn't for it's manga drawing specialization.This software is as I just implied quite simple and elegant at first glance, instead of having one main general purpose brush engine like most, it has 7 different brush engines for different brush types (from watercolor and airbrush to pencil and special effects) all in the same simplicity tier as SAI.

this oftware seems to be more strongly marketed in Japan is the only truly professional class manga illustration software, it does that job and it does it really, really, really well, so if that is your thing, this is quite possibly THE best software for you .

and as it is really simple, you can also happily use it as your first software. my main reason for not putting it up at the top are it's plethora of manga/comic book creation features, it's animation support, and confusing pricing strategy.

It is also all around quite feature rich compared to my first 3 recommended for beginner programs, but makes up for it by having a very elegant UI design making it a solid 5th place for most beginner friendly software. This program does everything it claims to do exceptionally well and is best for manga and comic book creation and works super well for cel-shaded (simple) drawing styles.

The clip studio paint EX version has some unique features including Animation, 2D to 3D conversion, multi-page management and multi-page files. It also costs like one kidney, but the pro version is quite affordable.

The Others

ArtRage (A program that like corel painter tries to emulate the feel of painting with rl brushes, omitted due to the imo slightly unreasonable asking price of $80).

Autodesk Sketchbook Pro (Costs $30 per year which is fairly affordable, I tried it but was ultimately unmipressed due to the programs complete lack of capability for working at high/custom resolutions. It is very simple, but as the name implies, it's decent as a sketching program and nothing more, I would have liked to expect more from a company like Autodesk. While some artists have managed to make quite impressive looking work in it, it seems ultimately unable to produce production quality work.).

GIMP (free, omitted because krita basically does everything GIMP does better than GIMP does it, Krita started out as a rework of the gimp but grew fast into it's own separate, and superior program).

Conclusion

And that's it for digital painting software may you test everything and choose wisely. If I forgot your favorite program make sure to tell me which one that is in the comments .

If you want to work with photoshop / Corel Painter etc. I'd recommend the XP-Pen Innovator 16 Best Drawing Tablet With Screen 15.6inch , however you will need a pc/laptop with good specs.

I just got the xp-pen drawing tablet monitor a few days ago. I can already tell I am going to love it! I kept going back and forth between getting it or not, but I am glad I finally decided to just invest in it.

In my opinion: Quick and easy to use. Like a digital sketchbook. You can draw on screen. The pen-pressure is awesome. You can draw in incredible details.

Both the XP-Pen Artist Pro Series and Innovator 16 are within my price range, and although I am not a professional artist and have no plans to make any money off my art, I'm concerned that I may feel that the XP-Pen Drawing Display is a downgrade.

And that's it for digital painting software may you test everything and choose wisely. If I forgot your favorite program make sure to tell me which one that is in the comments .

Hope that helps!

Wednesday, May 5, 2021

XP-PEN Star G430S Review: Affordable Graphics Tablet for Digital Writing and Drawing

Graphic tablets have become an essential tool among creative professionals and hobbyists alike, even more so now that working from home has become the norm for months—or years to come.

There is also no shortage of brands from cheap points of entry that offer satisfactory performance, to industry-grade staples like Wacom that everybody knows.

Wacom is a quality brand, but also at a price that for many is not viable, especially without having a very cheap entry range, with which new companies have been entering with cheaper alternatives.

From what I've read, XP-Pen is one of the leading makers of graphics tablet and that is why I chose to buy their Star G430S tablet.

This does not mean it's the best and it also doesn't mean that it's suitable for every task. It simply means that when we take into consideration price and features, this graphics tablet offers the best deal currently available.

This tablet is available on official store for $29.99 . So for around 30 bucks, you get a very good tablet that's very comparable to much more expensive tablets like the Wacom intuos.

Although this device is not necessarily innovative, the fact that it costs so little makes it an obvious choice for those who are still testing the waters before deciding on whether they should invest any money on a more expensive graphics tablet.

This is precisely why the Star G430S sells so much. The price is so incredibly low that anyone who buys it can rest assured that even if they don't love the product, they don't have much to love.

XP-Pen Star G430S Unboxing & Review : Small But Useful

I just bought the XP-Pen Star G430S recently. When I got I was amazed at the great packaging. I opened the box and unpacked all of the contents.

The XP-Pen G430S tablet comes with a USB cable, 10 pen nibs, one pen clip and a quick guide. Although XP-Pen pen nibs don't tend to wear out easily, it's great to have some extra ones.

Specifications :

Active area: 4 x 3 inches
Pressure sensitivity: 8192 levels
Resolution : 5080 lpi
Multitouch : No
Reading Height: 10mm
Report Rate: 266 PPS
Supply Voltage: DC5V
Interface Support: USB
USB Cable Length: 1.5M
Compatibility: Windows 10/8/7 , Mac OS 10.10 above
XP-Pen Star G430S official site: https://www.xp-pen.com/product/52.html

Design

The drawing board has an all-black design. It's made of lightweight plastic , only 2mm thick.

This drawing pad is slim and compact. You can easily put it on your laps while painting, or use it on limited desk space, take it on a trip, etc.

The Star G430S tablet has no bezels, but not all the area is usable. The active area takes only 4 x 3 inches meaning that you will have to use zooming a lot.

This is most noticeable on higher resolution screens. If you have a high resolution screen it is quite difficult to avoid having a shaking hand because of how small the tablet drawing space is.

Due to the rather small size of the active drawing area, this tablet is known as a “signature device”, meaning that its main function is to allow the user to sign on the board and transfer the signature to the computer in order to use it with digital documents, mostly in PDF format.

In addition, this model does not have quick action keys, since the Deco mini4 / Deco Fun S ( both come with 4 x 3 inches active drawing area ) model will cost us a little more if we want three action buttons on our drawing tablet.

Stylus

XP-Pen Star G430S offers a magical pen that will eradicate all the difficulties while drawing on the tablet . and it's important to note that the digital pen is not battery powered at all . The pen does not require recharge, so it is always ready to go.

The pen that comes with the XP-Pen G430S tablet is pressure-sensitive, allowing you to make fine lines or bold strokes by varying how hard you press.

The pen provides a resolution of 5080 LPI and 8192 pressure levels that allows you to draw better on the tablet surface. Besides, the report rate of the pen is 266 RPS and is exceptionally lightweight to give you pleasure in whatever task you perform.

With this magical pen, you easily sign any documents, sketch like you sketching on a piece of paper, draw, write and a lot more.

There are two buttons on the pen which are essentially the same as right-click and middle-click on a mouse. You "left-click" by touching the surface of the tablet. And if you browse over the internet by using the digital pen, you can do so by just pressing the button of the pen.

Install and Setup

The setup was quick and easy; connect the tablet via the USB cable, install the drivers, and start having fun! Just line up your screen area with the tablet. I was easily found the driver on XP-Pen's website ( https://www.xp-pen.com ). The updated driver even had more features!

The options are minimal, such as changing the sensitivity, the functions of the pen buttons, choosing the screen on which we act, testing the pressure of the pen, and advanced settings, which allow us to change the area of ​​the screen that we handle. with the tablet, the ratio and turn the actions if we are left-handed.

The tablet functions quite well. Not only that, but it was compatible with every OS (Windows ,Mac ) I tried it on. There is Linux ,Windows , and Mac OS driver offered for Star G430S on their official page.

The XP-Pen drivers will make it work with any drawing program. It compatible with a lot of programs like CorelDraw, Corel Painter, Adobe Illustrator, Adobe Photoshop, Paint tool SAI,Clip Studio Paint, Gimp,Krita, Inkscape, Zbrush , 3D Max, and a lot more. This cheap tablet ultimately helps you achieve your set goals and take the next move in the art world.

Use Experience

Fantastic tablet for osu!

This tablet is comfortable for osu , Really low latency using hovering or drag method. Software for the XP-Pen is not the best but it gets the job done.

This XP-Pen G430S OSU Tablet can both hover and drag , this is my personal opinion but I recommend you to drag ,it really give you a better aim ,at least in my case it did . you can't lift too high.

You'll get used to it fast especially if you were a high-sens mouse player (wrist-mainly), it's not like restarting osu! at all.

Of course you need to adapt from mouse to tablet but it's not that hard ,it only needs a few hours, and for me it made me instantly better ,like I destroyed all of my previous top scores the same day I got the tablet.

Overall love the product and they supplied so many extra pen tips. If you're using this for osu! it's definitely awesome and helped me jump from 4 stars to 5 star beatmaps!

Suitable for digital signature

Oh, and the tablet was good for creating a signature to use in adobe reader to sign documents. As far as a signing pad, it is fantastic. The small size makes it portable and it doesn't take up much room on my desk at all.

It works as advertised on Adobe Acrobat, Excel, MS Word and PowerPoint, though the pressure sensitivity is pretty much wasted on these things. For example, signing in Acrobat doesn't show any regard for pressure sensitivity. All the lines are equally as dark and thick no matter how you press.

Best writing solution for online teching

I use it when teaching online and it helps me illustrate concepts. I downloaded the microsoft whiteboard + onenote note taking app and my life is so much easier.

I use it to make my math videos mostly, but it has also been useful in drawing summary pictures for reading, underlining information in articles during video meets, and other things.

If you won't be using it for digital art, you are paying for features that you won't use or need.

Perfect for Photo Retouching & Editing

For working with photographs, the precision and ease of a pen beats a mouse any day. The pressure sensitivity allows me to alter the brush size or opacity just by pressing harder or lighter on the tablet as I draw.

Combined with the natural feel of the pen, this allows me to make photograph alterations involving hand-drawn layer masks and dodging/burning with ease. Actions that would have required multiple brush size changes, opacity changes, and tons of clicks of a mouse can literally be done in a single stroke with a tablet. I highly recommend getting a tablet if your mouse makes you frustrated while editing photographs.

Great for Graphic Design and Drawing

The XP-Pen Star G430S tablet is, of course, perfect for those doing graphic design and drawing. Also, the tablet is light and portable which may be important to students, outdoorsmen, artists, and those doing business presentations. It may also provide a great alternative input device for those with mobility issues.

The G430S is great for Illustrator and Photoshop. The sketch part works great. I can't believe how realistic it is. I couldn't believe I wasn't using a real pen.

Using the pen is just like writing with a pencil and paper. It feels very comfortable and very normal. The work surface is slightly textured so it feels much like pencil or pen on paper. The most unusual thing is that the pen movement is detected well before the pen touches the tablet. So you can actually control the movement before the pen and tablet touch.

In some cases, it makes you feel like you are using a magic wand. The response to the pen movements is quick and accurate. It even records levels of pressure sensitivity very accurately.

the hardware and software used in these devices were exactly the same being used in much more expensive drawing tablets, the only difference between them was the fact that the expensive ones had larger drawing areas. If you draw frequently, I suggest around a 10x6 inches for decent drawing space - XP-Pen Deco 01 V2 .

Good for 2D Animation

I found this tablet very useful when I use my 2d animaion software. It's good for touching up minor breaks in the lines so they can be filled easily and for painting them. Also for adding details that were lost by the scanner or adding simple background animation. In other words it's great for animators who can't afford the better ones. The mouse is pretty useless, I just use it as a paper weight but it doesn't hurt anything.

The mouse also comes in handy if you're using 3D programs like Maya (in which a mouse has benefits over a pen).

If you are going to need a tablet for a career in professional graphics/animation, I would recommend a professional model or display drawing tablets such as wacom cintiq or xp-pen artist , but would still recommend this product for travel/personal use.

Conclusion

Great XP-PEN product - a must have for artists and digital photographers to create/edit your work that's easy and fun.

As you can see from the information given in this XP-Pen Star G430S review, this model is simple but suitable for many types of work. You can use it for writing, signing, and working with documents, editing photos, drawing, sketching, and painting.

However, the drawing area is pretty small for some serious drawing projects. It seems like you are drawing on a small piece of paper. The unit is also extremely easy to install and is compatible with the most important programs.

Once I got the hang of using this tablet I was hooked. At first, finding where I was on the screen in relation to the tablet was a little difficult and frustrating. Given some time to practice and learn everything just fell into place.

When it comes to post processing this tablet really improves the speed and accuracy of processing and allows a true "feel" of the work. The whole process of editing seems more natural and the pressure sensitivity really adds a new dimension to the work.

I would definitely recommend the Star G430S to those who want to get a tablet and are just getting into the field of digital art or photo manipulation. Buy One!!!!!!!!!!!! They're Awesome! I sound like a sales person! YAY!

Buy Here:

You can Get it from United States official Store: https://www.storexppen.com/buy/star-g430s.html , If you live in other regions you can select from official site “Stores” List.

Wednesday, April 21, 2021

15 Best Free & Paid photo editors for beginners and professionals


Every moment in life is special, So we all want to capture those beautiful moments. “You not just click the moment we create a long-lasting memory”.

Either you are clicking the shot by mobile camera phone or a DSLR, everyone needs a few changes in look so, if you really care how your photos look, you need to import them into your PC to organize them and then go through all the click and select the best and perfect them with Photo Editing Software. Do changes for professional or personal use.

If you're a photographer looking for the best photo editing software for pc, you're not the only one.

After all, taking pictures is only half the battle – whether you're shooting on your phone or the latest mirrorless camera, we all need to edit our photos to make them look amazing.

In the right hands, the best photo editing software can take a dull image to something that can amaze your friends, or even win an award.

Editing software is essential for getting the most out of your image. Capturing the scene is only one step towards a perfect image. You'll want to tweak the exposure, contrast and/or other areas.

As a city photographer and architectural photographer, by post-processing, you'll be able to edit a number of exposures in parentheses, highlighting the sunshine or shade particulars you need as properly.

Commercial photographers select a formidable approach to vary the black and white layer into smooth gentle.

An artistic merged have a look at the picture is feasible by picture modifying. By altering the layer of curves to brightness, photographers have an effect on the distinction and saturation of the picture, for a greater mixing impact.

Almost all photographers shoot in RAW, however it can't be printed till it has been edited. By altering the color, lightening / darkening a picture, it may be printed.

With photo editing apps, photographers can change the distinction, coloration, hue, saturation, coloration, coloration, and extra. You can in truth take away the blur elements, undesirable objects from the scene; the shifting objects may be rectified to create an ideal click on.

Adobe products shine when it comes to editing photos. But, it's not the only credible photo editing software out there. In fact, there are plenty of photo editing software available on the market to explore and choose from.

Whether you need something simple for basic edits or you're someone that requires advanced features to edit your images like a pro, there's a free or paid photo editor for you.

This is our concise list of the 15 best photo editing software for photographers of all levels. We have done a full review of the photo apps & picked the top ones.

Each of these programs can perform the basic tasks of enhancing your photos to make them look amazing and some of these include advanced features similar to Photoshop that should satisfy your image creating and editing needs.

Top Photo Editing Software for PC and Mac from Beginners to Pro

1. Adobe Photoshop CC

Platforms: Windows,MacOS | Price: Paid

At the very top end of image editing is Photoshop, which has no real rival. It is one of the most popular photo editing software tools on the market. Photoshop is the primary tool for its legions of fans across the world, including designers, artists, and illustrators.

Its layering, masking and retouching tools still set the standard by which others are judged, while the power of its layer-based editing system can handle the most complex of creative projects.

Anyone who knows anything about photo editing and graphic design will have used one of the various Adobe Photoshop versions.

Photoshop offers similar tools to any other software in this realm, but to the nth degree – there are often several ways for performing the same function in Photoshop, be it changing a background colour, cloning elements, frequency separation, or any of the myriad other photo editing tasks.

Then there are the special effects and healing tools that only Photoshop can accomplish – AI-assisted tools like content-aware scale and fill . Being able to recreate a scene that doesn't already digitally exist is a powerful feature for photographers .

This latest version increasingly relies on Sensei, Adobe's highly touted artificial intelligence engine, to facilitate a host of impressive features. The most high-profile of these include Sky Replacement, new Refine Edge selections. Plus, Neural Filters help simplify complex workflows.

Even though Photoshop can be difficult to master, it's not necessarily difficult to learn. It's pre-made workspaces, in-app tools descriptions and clear tools icons help make learning the program more manageable. Don't try to dive in all at once! A piece-by-piece approach to Photoshop will likely be the more successful route.

Adobe Photoshop CC is available only as a subscription service .For $10 per month, you get the Photography plan, which offers Photoshop, Lightroom and Lightroom CC for the desktop and 20GB of online storage. For $20 per month you get the same Photography Plan with 1TB of online storage.

If you're wondering why Adobe has two lots of photo-editing software on the market, it's because they do different things. Lightroom is mainly a RAW developer and photo organising tool, while Photoshop is the software that you will need for more complex adjustments, working on layers, masks and channels.

There are no image browsing or cataloguing tools in Photoshop itself, but since Lightroom is included in the same Photography Plans as Photoshop, that's not an issue. On its own, Photoshop is powerful but limited; with Adobe Lightroom it's half of the world's most popular image editing double-act.

2. Adobe Lightroom

Platforms: Windows,MacOS | Price: Paid

Adobe Lightroom is another powerful editing software by Adobe. Ideally, it is perfect for photographers who want a more straightforward yet capable tool to edit their images.

Lightroom is an all-in-one image cataloguing, raw-processing and editing program and the perfect partner for Photoshop. If your main work is photo enhancement rather than manipulation, you might not need Photoshop at all.

Unlike Photoshop's complicated and intimidating user interface, both Lightroom Classic and CC offer a more intuitive and user-friendly interface for image editing.

Some of its excellent features include: customizable sliders, gradient and brush adjustments, presets, blurring tools and other professional filters. Plus, you can use it with multiple devices and to help you keep your photos organized it uses face detection. All things considered, with this wide range of functional features and its easy-to-use interface, you can create just as remarkable photos with Lightroom.

Lightroom have a library of pre-made editing solutions called presets. These presets make it easier than ever to achieve a specific look in your photos. Simply find a preset package you like via Lightroom's preset marketplace or online, then apply it to one or more of your images for a flawless edit.

Of course, presets work wonderfully for batch editing your photos at a break-neck pace. And, you can even design your own custom presets. With Lightroom's presets, you have the opportunity to continually expand the software's editing capabilities.

Not to mention, many third-party plugins and applications have integrated with Lightroom to make using the program even easier. Envira Gallery, for example, includes Adobe Lightroom to WordPress integration that allows you to easily sync your Lightroom photo galleries with your photography website.

Another great thing about Adobe Lightroom, that many people praise it for, is the organizing capability it offers – you can add tags and sort your photos in your own style.

Unlike Photoshop, Lightroom is built to handle entire photo collections at once. You can import, sort, and edit your files all within the same simple interface.

Lightroom is the fact that it supports nearly all formats of RAW files, no matter the camera you're using, so this can be a factor to consider when choosing one of these tools.

Lightroom is one of the best photo editing software for pc that allows you to retouch full resolution images. This tool allows you to view, download, or add photos on the web. It offers a wide range of layouts.

3. Corel PaintShop Pro

Platforms: Windows | Price: Paid

Corel PaintShop Pro is a capable and one of the most inexpensive photo editing software tools out there. Some photographers call it an Adobe Photoshop alternative, but it lacks Photoshop's most advanced flagship features, including Camera Shake Reduction, 3D modeling, Faces Liquefy, detailed typography, among others.

Photographers who value simplicity will really like Corel PaintShop Pro . That being said, do not let its simple approach to photo editing fool you as it does not make its editing capability any less effective.

This software boasts everything you require to enhance your pics from AI enhanced presets to graphic design templates to options such as blur and fix. Plus, if the wide range of brushes, color palettes , textures and backgrounds do not float your boat, do not dismiss the software just yet as brand new features are being added continuously.

Now boasting numerous powerful AI-Powered tools that go well beyond free Photoshop alternatives, PsP has become a fully-featured graphics manipulation tool that provides excellent value for money.

In many ways, Corel PaintShop Pro is a powerful program, and It's easy for novices to grasp, and has some additional tools, such as 360-degree photo editing. It's also touch-screen compatible and has a new streamlined workspace. Corel has even made the tool icons large and distinct so that they're easy to select on a touch device.

You can preview, organise, and streamline your photo editing workflow in the Manage workspace, which also allows you to add keyword tags to your photos, create catalogues, make batch edits to multiple images at once, and review metadata and file information.

If you need to extend its capabilities, Paintshop Pro supports various 64-bit plugins from Adobe, Topaz Labs, Nik Collection by DXO and many more. You can even import and export PSD files to work across platforms.

PaintShop Pro is a fantastic option that represents a unique amalgamation of Lightroom and Photoshop in one. Like some other software, it requires a one-time fee, which starts at around $60 to get a life-time license. For that price, you gain access to dozens of textures, backgrounds, and brushes to choose from. And, app updates add new features all the time.

This software is comprehensive and powerful enough to help you with any tasks, but remember the fact that you'll have to pay for most of the features offered. They have multiple payment plans, and with those come more and more options you can use – so this can be a little tricky. Other than that, there's only one more thing that can be a major drawback for some: it is only Windows supported. Think it through before making a choice.

4. Affinity Photo

Platforms: Windows,MacOS | Price: Paid

If you're looking for a pro photo editor like Photoshop, Affinity Photo is an excellent choice. Affinity Photo is sold at a budget price point, but it has the tools and the features and the power to compete with Photoshop head-on.

Serif has focused particularly heavily on the retouching market, with cloning, healing and retouching tools, an Inpainting tool for automatic object removal and a dedicated Liquify persona (workspace) for localized image distortion effects.

That being said, Affinity Photo's primary focus is photography, so it lacks a few of Photoshop's extra features (like 3D editing).

Other than this, Affinity Pro's main difference with Photoshop is how the tools are organised. It uses “personas” instead of workspaces and that might take a little getting used to for folks used to Photoshop.

It comes with layers, masks, smart objects, colour management, and both CMYK and RGB editing, as well as decent Raw file conversion. its filter effects can be applied ‘live' and its HDR tone mapping and workspace tools are excellent.

From focus stacking and panorama stitching to HDR merging and digital painting, it has just about everything you could want in a photo editor.

Like Photoshop, though, it's focused solely on in-depth, technical image manipulation. It doesn't have its own browsing and cataloguing tools and it doesn't do instant preset effects. Affinity Photo will bring the tools, but you have to bring the vision.

For just $50—or cheaper if there's a sale—Affinity gives users a surprisingly complete set of Photoshop-like features. but subscription-free, via a single extra-low payment.

As far as the learning curve is concerned, much like Photoshop, the tools in Affinity Photo are quite in-depth and will take some time to explore and learn. Luckily the interface is quite logical, and if you've used Photoshop before the tools will make sense.

5. Capture One Pro

Platforms: Windows,MacOS | Price: Paid

Capture One is a RAW image editor made by the camera company, Phase One. If you are a photographer who is mostly interested in enhancing RAW images, then this is a better option than Adobe Lightroom.

Capture One works both as tethered capture and editing tool for studio photographers with a 'sessions' based workflow and as a Lightroom-style image cataloguing, searching and non-destructive editing tool. It works in a single window rather than in Lightroom-style ‘modules' and has a highly customizable set of ‘tool tabs'.

One of the key differences is its layers-based local adjustment system which makes it much easier to see and edit your changes to your work, and this now includes 'parametric' linear and radial gradient masks which you can edit later. Capture One's conversions look smoother and sharper than Lightroom's.

Its raw conversions are sharper and less noisy than Adobe's, but it doesn't support such a wide range of camera raw formats or as large a number of lens correction profiles. It doesn't have Adobe's mobile apps and online synchronization options either, but it does offer professional-grade ‘tethering' tools for studio photographers capturing images via a computer.

Capture One Pro also has a better system for applying local adjustments, using adjustment layers and masks. It's expensive, but very, very good.

This RAW image editor boasts some features that set it apart from the other software solutions available. For starters, if you need to work with big volumes of photos that are more than 20 megapixel RAW files, you will be impressed with its speed. What is more, to help you work more efficiently, the interface boasts some great customizability which means that you can change the keyboard shortcuts and layout to suit your preferences better.

If you often work with layers, you will also love the fact that it does not become slower when you have too many layers. Plus, it lets you make several adjustments per layer.

Some of its other fabulous features that will help you to work more efficiently are its sophisticated color editing and annotations. Its sliders make it much easier to tweak the granularity, while the annotations feature lets you jot down ideas to ensure that you can collaborate smoothly with other photographers and designers.

You do need a relatively powerful computer to run Capture One Pro smoothly. The only real strikes against it are the fact that there's no HDR or panorama options, the steep learning curve, limited plugin support compared to other software, and the price.

The full-fledged version retails at close to $300. There's also a subscription option at $20/month ($15/month if you prepay for a year) – considerably more expensive than Adobe's Creative Cloud Photography Plans.

6. Gimp

Platforms: Windows,MacOS, Linux | Price: Free

GIMP is a free, open-source photo editing software that's easy to download and install on your computer. It has multiple features which help you with retouching photos, photo composition and picture enhancement. It also includes a built-in file manager.

If you're a photographer, graphic designer or illustrator with a limited budget, GIMP offers many powerful features that with other software you'd have to pay to use.

The user-interface takes some getting used to and isn't as refined as Photoshop, but as with any editing software, once you're familiar with it, movements become second nature.

Once you launch the program, you'll find a dedicated window that displays the image. You'll also see two floating docks: One with the toolbox and another for managing layers, paths, brushes, and more.

It's also completely customisable, with dialogues allowed to float anywhere on the screen. You can customize not only the tools available, but also your workspace's color, widgets and widget spacings.

All the essential image editing tools are there: noise reduction, cropping, colour adjustment, gradients, brushes, curves and image enhancements.

For blemishes, there is the clone stamp, healing tools and you can even apply changes to isolated areas.

When using a large display, or two monitors, you'll have an expansive workspace to edit your images. Icons in the toolbox represent specific tools, like Scale, Pencil, Paintbrush, Bucket Fill, Airbrush, Smudge, and more. You can apply numerous filters, too, such as dropping a shadow, adding a neon effect, adding a glass tile, removing devilish red eyes, and so on.

It can handle all the usual file types, including RAW, JPEG, TIFF, PSD, GIF and more.

Because GIMP is open-source, there's a very active community of users who have created plugins to add even more functionality to the program. However, despite a more user-friendly interface than past versions, Gimp offers almost nothing in the way of guidance, which makes it much more difficult to learn than other photo-editing software.

This free professional software for editing photos is another excellent Photoshop alternative for beginners. It boasts a variety of features that can assist novices with digital photo retouching and composition. With the help of features like vignette and corrective mode, you can also take your photos of any file format to the next level.

Gimp is good for starters and professionals with limited requirements. However, it is not an ideal option for pro-level editing work.

7. Paint.Net

Platforms: Windows | Price: Free

Paint.Net is an easy and convenient image editor with a clear and well-ordered interface. It offers you tons of Layers and filters, Plugin support but when compared with the GIMP, It is less powerful than GIMP.

With Paint.Net you can make some basic editing without deep changes and professional retouch. The software will come in handy for Social media marketing Specialists and Photography lovers who need to put pictures in order fast.

Paint.Net has a similar Adobe Photoshop interface. Tools like a magnifier, crop frame, color picker, and brushes are placed on the bar on the left side, history of editing and layers to work on - on the right side in different windows. All image editing functions are available in the Adjustments menu, including tools of Hue / Saturation and Curves.

These tools are usually used by professional photographers and photo retouchers. In this program, you can overlay layers, mix them, for this you need to choose a "Layers" palette tool. You can return to any stage of photo editing.

The name doesn't sound all that fancy. Although it sounds like Microsoft Paint, it is a dedicated photo editor. Albeit a basic one. It is easy for beginners as it has layers, unlimited history, and special effects.

Editing with Paint.Net is very fast and easy, even on older systems, despite the fact that it lacks some advanced tools. It is free, but unfortunately for Mac users, it is exclusive to Windows.

Sometimes it is important to work with a YouTube photo editor that does not include very many complex features. While going with this software, You see it's a quick, easy to work with and help you to create new look images.

8. Photofiltre Studio

Platforms: Windows | Price: Free and Paid

Photofiltre is not a widely known photo retouching program which won't cost you a penny, but it has plenty of features that casual photo editors will find useful.

As its name suggests, PhotoFiltre offers plenty of terrific filters and tools for enhancing images. There are filters for adjusting brightness, contrast, increasing and decreasing saturation as well as sharpening or blurring images.

It has a host of artistic filters, too, including textures, watercolor, pastels, sepia tone, black and white, night and sunlight effects and emboss. It even has a puzzle effect.

The program doesn't offer layers, though it does allow you to put text over an image. Many don't use layers anyway so, for them, the lack of this feature is no loss.

Whatever filter you apply it can be undone. It also can be faded. So if the original effect is too strong, you can reduce the amount via the Edit menu.

PhotoFiltre includes an Image Explorer, which is accessed through the Tools menu. Open any image folder on your hard drive and its contents are shown along the bottom of the window. Simply double click on a photo to open it and begin editing.

You can do automated batch processing of any number of photos. Select the Source and Output folders and file format such as JPEG, GIF and TIFF. Next select the image size and if you want a frame automatically added to the images. The size and color of the frame can be adjusted.

During the batch process, brightness, contrast, saturation and Gamma correcting can be applied to photos. You can apply a few filters such a sharpening and scanlines, and rotate or flip images. The batch process is fast and easy. Since not all photos need the same amount of processing, do a test run to see if the results are to your liking.

An advanced version of PhotoFiltre , called PhotoFiltre Studio, is also available for a nominal fee. Unlike the free version, PhotoFiltre Studio has layering capabilities. It is shareware and can be tried for a 30-day period.

9. PhotoScape X

Platforms: Windows, MacOS | Price: Free and Paid

Photoscape X is an incredible photo software editing program that people from all around the world can use; it's compatible in a number of different languages.

Using Photoscape is ‘easy and fun'. it allows you to easily edit photographs taken from their digital cameras or even mobile phones.

Although the Photoscape editor does not have a lot of advanced editing tools, the app is best used as a quick editor. It contains essential tools that allow you to apply filters, frame, crop, add text, draw, clone and so on.

Photoscape is stuffed with a lot of features while retaining its ease of use. It has just about any tool you might be looking for – white-balance correction, color correction, brightness and contrast, etc.

The app's features include a raw converter, file renamer, batch processor, viewer, color picker, screen capture tool, and print layout tool.

It even has a GIF animation, and will convert your RAW images to JPG. You can also customize your toolbar into the features you use most, combine and split images, and make slideshows.

Original photos can be edited using the one and only Magic Color with Photoscape X. Plus, over 240 features and over 1,000 patterns are easily accessible. It also boasts some really cool Instagram-like filters, frames and vintaging options.

The only real downside to Photoscape is that it runs ads for other “recommended” software – the price you pay for “free.”

PhotoScape is one of my favorite tools for post-processing, mostly because it has a friendly UI and quick editing features. It is one of the better free photo editors out there, and it's well worth checking out.

10. Darktable

Platforms: Windows, MacOS , Linux | Price: Free and Paid

Darktable is an open-source photo-editing application that allows you to enhance raw images. It also happens to be one of the only free image editors that doubles as a space to store and organize your photos. This app enables you to automate repetitive tasks. It also allows you to manage color with no hassle.

You can add tags to images, rate them, organize them into folders, and mark them by color. It also allows you to create and save your own presets, making one-click editing a breeze.

The interface is almost identical to Lightroom's, with the ability to quickly toggle between your photo library and editing tools. The main photo editing workspace is clear and straightforward, with a well-designed and friendly interface for something that doesn't command a price.

You view your files in the ‘lighttable' tab, with editing taking place in the ‘darkroom'. Under ‘other', you have map, print, slideshow and tethering modules, all of which load near-instantly.

There are some very powerful tools to be found. For example, lens and perspective corrections come as standard. also, there are surprising additions such as tethered shooting, selective colour correction, snapshots, multiple moveable masking options, and a completely customisable workspace. You can even add third-party modules.

You are not restricted to jpgs, as Raw files are easily and automatically converted. Darktable also offers non-destructive editing, allowing you to convert back to your original image quickly and easily.

DarkTable tends to fall short in accurate camera profile matching. Still, contributors do a great job in offering support for new cameras and lenses – the automatic lens correction is particularly impressive, and rivals any paid software.

There aren't enough tools for professional photographers, and Darktable can get buggy and crash if files are too large. While the tools offered are similar to those in Lightroom, it does fall short in its ability to handle professional color manipulation.

Although it doesn't offer all of the advanced tools of Photoshop, it does a great job as a free Lightroom alternative. It's a good starting point for beginners. There are no adverts or annoying, locked premium features.

Online Photo Editors List

From adjusting just the basic brightening of the image to the more complex adjustments like taking wrinkles and lines off of our faces and correcting our smiles and our bodies.

We live in a fast paced world of social media today and are in constant need of finding ways to edit our images. It's always convenient if we can find something that is online so we don't really need to download too many apps on our systems.

I have put together a list of web based editors that are easy to use and will help you get your basic image adjustments done to perfection.

11. Pixlr

Platforms: Web browser-based | Price: Free and Paid

Pixlr is a free photo editor that's 100% online. This is great for people who are wary of downloading free programs onto their computers. This works with HTML 5 rather than flash, so no unnecessary downloads on your end. I chose this editor because it works seamlessly with machines that do not have a lot of space (example: Chromebooks).

Pixlr offers a Chrome App that connects to Google Drive. No account is necessary to use Pixlr; you only need to create one if you want to use the Pixlr Library with free cloud storage.

The crowded toolbar reminds us of Photoshop. This photo editing tool includes most of the common photo editing tools such as: magnifying glass, lasso, dropper, pencil and paint brush. It also features a red eye removal tool and a color palette which you can use to fix the color of your image. To add more versatility, you can work with layers.

With the retro vintage editor, you get access to three settings. Each of the settings has a side scrolling list of effects you can use to customize your image. However, whether you use the vintage or basic photo editing tool, you can come up with a high-quality image.

With it, you can create clean canvases, on which you add your photograph. I was impressed by the number of tools that this photo editing software has to offer, everything from standard options, to unique effects and layering features.

A handful of filters such as HDR, glamour glow, and vignetting offer quick and easy ways to improve your photographs. With this photo editor, you can make finely detailed changes to colors, saturation, and vignette effects. On top of these, sharpening and blurring your images is a breeze.

When you go to Pixlr's website, you can choose to use Pixlr Editor or Pixlr Express. Pixlr Editor enhance your image with Free Photo Editing Software features that are similar to Photoshop like cropping, resizing, and changing the colour of the entire image. while Pixlr Express suited for applying filters, texts, and other overlays effects to a photo. The desired Extension can be applied to save your edited image as JPG, PNG, BMP, TIFF, and PXD (layered Pixlr image).

Pixlr offers a free version. However, it is cluttered with ads, which is a major distraction for any photo editing professional. Pixlr is right now offering substantial discounts on its pro subscription plans. You can get a monthly subscription at $5 and quarterly at $12.

12. Photopea

Platforms: Web browser-based | Price: Free and Paid

Like Pixlr, Photopea is a photo editing program that works completely online. This means you won't need to worry about downloading any software onto your computer.

Photopea supports numerous file formats, including PSD, XCF, CDR, etc. making it great for photographers, graphic designers, and graphic artists.

This one could win the hearts of many, as it is internet-based and completely free. If you give Photopea a try, you'll see that it is super similar to Photoshop in many ways.

Of course, Photopea doesn't provide all the functions that are present in Adobe software. But its feature set is extensive enough to satisfy users, especially those, who aren't willing to spend much on the subscription.

The Photopea offers a wide variety of image editing tools, including advanced features like spot healing, a clone stamp healing brush, and a patch tool. The software supports layers, masks, smart objects, layer styles, filters, vector shapes and masks, and more. A full rundown of Photopea's tools is available on the app's website, as well as tutorials for select basic activities.

Unlike Pixlr, Photopea doesn't offer an image library. If you close your browser without saving, you'll lose your work.

It is one of the best photo editing app for PC that works for both vectors as well as raster graphics. It is equally suitable for complicated procedures like web-page design, making illustrations, editing pictures and simpler ones like changing the size of pictures.

Photopea is free, but in exchange you'll notice a lot of ads around the interface. If these are too distracting, you'll need to pay $9 a month to get rid of them. At this price, you could nearly be paying for an Adobe subscription.

13. Fotor

Platforms: Web browser-based | Price: Free and Paid

If you're looking for a tool that simplifies the photo-editing process, then you will definitely love Fotor. This application can be used with no knowledge. It allows you to drag and drop images. It's one of the simplest tools that you could ever use that doesn't forfeit in terms of editing options.

Do you want to tweak your color balance, brighten the image or simply crop your composition? With Fotor it's easy-peezy. A few other editing options include the possibility to add borders, frames or effects such as scratchy pencil or the look of paper.

some of its main features include: design templates, filters, HDR effects, and portrait retouching. Alternatively, if you are looking to create a bit more informal design, there are countless shapes, fonts and stickers that you can play around with.

This online photo editor and collage maker also comes in a full-fledged desktop application. Moreover, it supports RAW photo conversion, which is a valuable feature for free software.

The software also comes loaded with image enhancing tools, including numerous filters to create stunning images. Its user interface is quite simple to use and offers stunning one-click filters, which can enhance your images instantly.

In case you don't like the software's interface, you can simply customize it and swap things around by changing the theme.

The cloud-based software allows you to save the incomplete designs for future editing. That way, you can start from where you left the work. All you need to do is upload your images onto the website and you can start editing, creating designs and more.

For the free photo editor, you are limited to working with 4000px images. This resolution is something most enthusiast or hobby photographers won't have a problem with but can become a hindrance to larger images.

This well-known cloud-based software boasts more than 300 million users already. Fotor is the ideal tool for photographers who don't have a lot of experience with post-processing, or who want to preserve the original quality of their digital imagery. But it will not satisfy you if looking for professional photo editing or adjustments.

14. Befunky

Platforms: Web browser-based | Price: Free and Paid

Befunky is very good online photo editor with lots of stunning picture editing options. It's used for making basic photo enhancement and color correction, create collage and graphic design. This app enables you to crop and resize photos with ease.

There are 10 modules for image editing, which are organized in the form of a side panel. I like that you can create layouts of your works, import images, customize them as you wish, and then change the layout without overloading the pictures.

It works especially great with collages. Create a simple collage is very easy. There are hundreds of great photo collage templates, but the problem is that most them are closed for free use.

If you have a specific area that needs retouching, the tool has a variety of options for taking your image to the next level. It's simple, easy to use, and performs well in your web browser.

BeFunky also has another cool feature, called Graphic Designer, which allows you to create brochures, posters, social media posts, and even your own templates, right in the app. While it may lack certain professional features, such as editing layers, can't open RAW pictures. you won't find a more efficient option for getting high-quality, creative images in little time.

The best feature, though, is the AI image enhance button that does a pretty good job for you in just one click.

However, most of the features are chargeable, so you will have to spend some amount of money to use all of them. But you will be able to do the basic editing of the image, with features like crop, resize, rotate, exposure, beautify, smoothening and blur, free of cost.

This is a great option for beginners, but for more advanced users, the functionality and capabilities won't be enough. Moreover, the free version of the image editor comes with more than 30% of limited tools and constant intrusive advertising. I would choose this software if I could access art effects free of charge, since they are fantastic.

15. Canva

Platforms: Web browser-based | Price: Free and Paid

Canva is a free photo editor that runs in your browser and is perfect for turning your images into other business assets like social media posts, brochures, presentations, and more.

This online design tool offers a ton of powerful editing features, including a drag-and-drop design tool and millions of stock photos, vectors, and illustrations.

You won't find advanced tools here. For clone brushes and smart selectors, you'll need to look elsewhere. But, you will find sliders covering an array of adjustments.

With Canva, you can easily edit photos using preset filters or get advanced tools like tints, vignette effects, sharpening, brightness adjusting, saturation and contrast, and more.

I was amazed at how easy it was. You can edit right from the browser! Upload your image, play around with the filters, and download your photo. It's really that easy.

Whether you simply want to crop or straighten a photo or want to get creative with textures, fonts, badges and stickers, Canva can help. Some of its other features include vignette, photo blur, a speech bubble maker, an image transparency tool, photo frames and design grids.

Though, if you do not know where to start, be sure to visit the Canva Marketplace where you can find more than 8000 templates. Its basic features are available free of charge, but the more advanced features must be paid for. If you need to edit on the go, you will be happy to know that you can download it to your smartphone.

If you want to build a consistent presence around your entire business—from product photos to marketing assets—Canva's got you covered.

This web browser free editor software is a perfect place for changing your images into gifts, either for yourself or family and friends. Cards, posters, and invitations are easily created if you don't opt for social media stylings.

There are upgradable options other than free software. Canva for work comes in $12.95 and gives you access to thousands of stock images and unlimited storage. All of which is handy for your business.

Do I need a graphics tablet for photo editing?

When I first started editing photos in Photoshop, I used a mouse on my desktop and laptop for everything, from drawing complex masks to painting contrast into the sky. It worked, but it was difficult to do accurately and caused a whole load of hassle. It took me some time to make the leap and go from using a mouse to using a art tablet for photo editing, but once I switched to a Photoshop tablet, I have never looked back.

My first run-in with a pen and tablet for Photoshop was in 2018 with a XP-Pen Star G640 Tablet. I can still remember getting it. It felt awesome to use but was also very difficult to get used to. At first, I used it for everything because, well, I could! After a while, I realized the pen and tablet are just tools for post-production and it doesn't need to be used for everything. There are two main tasks I use my pen for while I edit.

Before I discuss what I use them for, let's take a look at why I use them.

The pen and tablet is kind of like a mouse with one very special characteristic that makes it stand out, pressure sensitivity. When you are using a brush in Photoshop with a mouse what you click is what you get. What I mean is, whatever brush presets you have set, the brush will respond with. Sometimes that means you will get a harsh line and the only way to make it less abrasive is to lower the opacity. However, you can only have one opacity set at a time, right?

Wit a pen and tablet things are a little different. A Pen and Tablet will use your hand's pressure on the tablet to respond with the appropriate opacity, flow, or size. So, the softer you brush with your pen, the smaller or lighter the stroke will be. The harder you press, the darker or larger the line will be.

As you can see in the photo above, with the mouse, what you click is what you get. With the Pen and Tablet, you have a lot more versatility and all with the delicate stroke of the pen on the tablet. This give you a ton of control when you are editing your images.

I primarily use the pen and tablet for two things in Photoshop, Masking and Dodging & Burning.

You may have heard of a pen and tablet before. The term Wacom is almost synonymous with the pen and tablet. However, other brands such as XP-Pen also offer a wide range of options with an equally wide range of features. Where they differ significantly is price. xp-pen tablet is about at around a third of that of the same wacom model.

The entry level XP-Pen Star G640 has only 6 by 4 inches of the active working area , but this will still be sufficient for most home users and those starting out with their photo editing, making the Star G640 the best beginner drawing tablet. I would recommend the small size as sufficient for most users, although there exists of all sizes from A7 to A3.

When looking for the best pen pad for Photoshop, you need to make a personal decision on whether you want a drawing tablet with a screen or not. You definitely don't need a graphics tablet with a screen, but they can improve the accuracy of your Photoshop work, depending on your technique. If you do want one, you will be looking at a significantly increased cost, although it is possible to get a relatively cheap drawing tablet with screen, such as the XP-Pen Artist 12 Pro , if you are more budget limited.

The XP-Pen Artist 12 Pro is an excellent budget drawing tablet with screen. Technically, the pen pressure and accuracy are on a par with Wacom, although in real-world practice the Wacom tablets come out on top. There are many more models in the XP-Pen Artist series if you have more to spend and are looking for a larger screen.

Conclusion

There are many photo editing software's on the web ,depend on what type of photo editing you usually do. Whether you are a professional or beginner, you can use any of these photo editing tools.

Choose the tool that not only appeals the most to you but is also very easy to use and enables you to achieve desirable results.

Now that you have a good understanding of the top paid and free photo editors out there, it's time to get testing! If you don't want to spend money on a photo editor, start with a free one or a free trial, then take it from there.

Not all software is meant for everybody. For example, Adobe Photoshop needs months/years of practice to become an expert.

However, other software like Canva, Fotor, etc. are browser-based, and they need you to be familiar with their layout. Of course, you needn't be a design expert to get going with any of these.

We hope this article will help you pick the best photo editing app for your computer. Check the pros and cons and go to the official website to download the chosen software!

this article was just my opinion. You should try them out and judge for yourself. Hard work pays off and results will come in no time! Happy Editing!

Leave any questions or suggestions below !

Source: https://www.xp-pen.com/forum-1790.html