Wednesday, April 21, 2021

15 Best Free & Paid photo editors for beginners and professionals


Every moment in life is special, So we all want to capture those beautiful moments. “You not just click the moment we create a long-lasting memory”.

Either you are clicking the shot by mobile camera phone or a DSLR, everyone needs a few changes in look so, if you really care how your photos look, you need to import them into your PC to organize them and then go through all the click and select the best and perfect them with Photo Editing Software. Do changes for professional or personal use.

If you're a photographer looking for the best photo editing software for pc, you're not the only one.

After all, taking pictures is only half the battle – whether you're shooting on your phone or the latest mirrorless camera, we all need to edit our photos to make them look amazing.

In the right hands, the best photo editing software can take a dull image to something that can amaze your friends, or even win an award.

Editing software is essential for getting the most out of your image. Capturing the scene is only one step towards a perfect image. You'll want to tweak the exposure, contrast and/or other areas.

As a city photographer and architectural photographer, by post-processing, you'll be able to edit a number of exposures in parentheses, highlighting the sunshine or shade particulars you need as properly.

Commercial photographers select a formidable approach to vary the black and white layer into smooth gentle.

An artistic merged have a look at the picture is feasible by picture modifying. By altering the layer of curves to brightness, photographers have an effect on the distinction and saturation of the picture, for a greater mixing impact.

Almost all photographers shoot in RAW, however it can't be printed till it has been edited. By altering the color, lightening / darkening a picture, it may be printed.

With photo editing apps, photographers can change the distinction, coloration, hue, saturation, coloration, coloration, and extra. You can in truth take away the blur elements, undesirable objects from the scene; the shifting objects may be rectified to create an ideal click on.

Adobe products shine when it comes to editing photos. But, it's not the only credible photo editing software out there. In fact, there are plenty of photo editing software available on the market to explore and choose from.

Whether you need something simple for basic edits or you're someone that requires advanced features to edit your images like a pro, there's a free or paid photo editor for you.

This is our concise list of the 15 best photo editing software for photographers of all levels. We have done a full review of the photo apps & picked the top ones.

Each of these programs can perform the basic tasks of enhancing your photos to make them look amazing and some of these include advanced features similar to Photoshop that should satisfy your image creating and editing needs.

Top Photo Editing Software for PC and Mac from Beginners to Pro

1. Adobe Photoshop CC

Platforms: Windows,MacOS | Price: Paid

At the very top end of image editing is Photoshop, which has no real rival. It is one of the most popular photo editing software tools on the market. Photoshop is the primary tool for its legions of fans across the world, including designers, artists, and illustrators.

Its layering, masking and retouching tools still set the standard by which others are judged, while the power of its layer-based editing system can handle the most complex of creative projects.

Anyone who knows anything about photo editing and graphic design will have used one of the various Adobe Photoshop versions.

Photoshop offers similar tools to any other software in this realm, but to the nth degree – there are often several ways for performing the same function in Photoshop, be it changing a background colour, cloning elements, frequency separation, or any of the myriad other photo editing tasks.

Then there are the special effects and healing tools that only Photoshop can accomplish – AI-assisted tools like content-aware scale and fill . Being able to recreate a scene that doesn't already digitally exist is a powerful feature for photographers .

This latest version increasingly relies on Sensei, Adobe's highly touted artificial intelligence engine, to facilitate a host of impressive features. The most high-profile of these include Sky Replacement, new Refine Edge selections. Plus, Neural Filters help simplify complex workflows.

Even though Photoshop can be difficult to master, it's not necessarily difficult to learn. It's pre-made workspaces, in-app tools descriptions and clear tools icons help make learning the program more manageable. Don't try to dive in all at once! A piece-by-piece approach to Photoshop will likely be the more successful route.

Adobe Photoshop CC is available only as a subscription service .For $10 per month, you get the Photography plan, which offers Photoshop, Lightroom and Lightroom CC for the desktop and 20GB of online storage. For $20 per month you get the same Photography Plan with 1TB of online storage.

If you're wondering why Adobe has two lots of photo-editing software on the market, it's because they do different things. Lightroom is mainly a RAW developer and photo organising tool, while Photoshop is the software that you will need for more complex adjustments, working on layers, masks and channels.

There are no image browsing or cataloguing tools in Photoshop itself, but since Lightroom is included in the same Photography Plans as Photoshop, that's not an issue. On its own, Photoshop is powerful but limited; with Adobe Lightroom it's half of the world's most popular image editing double-act.

2. Adobe Lightroom

Platforms: Windows,MacOS | Price: Paid

Adobe Lightroom is another powerful editing software by Adobe. Ideally, it is perfect for photographers who want a more straightforward yet capable tool to edit their images.

Lightroom is an all-in-one image cataloguing, raw-processing and editing program and the perfect partner for Photoshop. If your main work is photo enhancement rather than manipulation, you might not need Photoshop at all.

Unlike Photoshop's complicated and intimidating user interface, both Lightroom Classic and CC offer a more intuitive and user-friendly interface for image editing.

Some of its excellent features include: customizable sliders, gradient and brush adjustments, presets, blurring tools and other professional filters. Plus, you can use it with multiple devices and to help you keep your photos organized it uses face detection. All things considered, with this wide range of functional features and its easy-to-use interface, you can create just as remarkable photos with Lightroom.

Lightroom have a library of pre-made editing solutions called presets. These presets make it easier than ever to achieve a specific look in your photos. Simply find a preset package you like via Lightroom's preset marketplace or online, then apply it to one or more of your images for a flawless edit.

Of course, presets work wonderfully for batch editing your photos at a break-neck pace. And, you can even design your own custom presets. With Lightroom's presets, you have the opportunity to continually expand the software's editing capabilities.

Not to mention, many third-party plugins and applications have integrated with Lightroom to make using the program even easier. Envira Gallery, for example, includes Adobe Lightroom to WordPress integration that allows you to easily sync your Lightroom photo galleries with your photography website.

Another great thing about Adobe Lightroom, that many people praise it for, is the organizing capability it offers – you can add tags and sort your photos in your own style.

Unlike Photoshop, Lightroom is built to handle entire photo collections at once. You can import, sort, and edit your files all within the same simple interface.

Lightroom is the fact that it supports nearly all formats of RAW files, no matter the camera you're using, so this can be a factor to consider when choosing one of these tools.

Lightroom is one of the best photo editing software for pc that allows you to retouch full resolution images. This tool allows you to view, download, or add photos on the web. It offers a wide range of layouts.

3. Corel PaintShop Pro

Platforms: Windows | Price: Paid

Corel PaintShop Pro is a capable and one of the most inexpensive photo editing software tools out there. Some photographers call it an Adobe Photoshop alternative, but it lacks Photoshop's most advanced flagship features, including Camera Shake Reduction, 3D modeling, Faces Liquefy, detailed typography, among others.

Photographers who value simplicity will really like Corel PaintShop Pro . That being said, do not let its simple approach to photo editing fool you as it does not make its editing capability any less effective.

This software boasts everything you require to enhance your pics from AI enhanced presets to graphic design templates to options such as blur and fix. Plus, if the wide range of brushes, color palettes , textures and backgrounds do not float your boat, do not dismiss the software just yet as brand new features are being added continuously.

Now boasting numerous powerful AI-Powered tools that go well beyond free Photoshop alternatives, PsP has become a fully-featured graphics manipulation tool that provides excellent value for money.

In many ways, Corel PaintShop Pro is a powerful program, and It's easy for novices to grasp, and has some additional tools, such as 360-degree photo editing. It's also touch-screen compatible and has a new streamlined workspace. Corel has even made the tool icons large and distinct so that they're easy to select on a touch device.

You can preview, organise, and streamline your photo editing workflow in the Manage workspace, which also allows you to add keyword tags to your photos, create catalogues, make batch edits to multiple images at once, and review metadata and file information.

If you need to extend its capabilities, Paintshop Pro supports various 64-bit plugins from Adobe, Topaz Labs, Nik Collection by DXO and many more. You can even import and export PSD files to work across platforms.

PaintShop Pro is a fantastic option that represents a unique amalgamation of Lightroom and Photoshop in one. Like some other software, it requires a one-time fee, which starts at around $60 to get a life-time license. For that price, you gain access to dozens of textures, backgrounds, and brushes to choose from. And, app updates add new features all the time.

This software is comprehensive and powerful enough to help you with any tasks, but remember the fact that you'll have to pay for most of the features offered. They have multiple payment plans, and with those come more and more options you can use – so this can be a little tricky. Other than that, there's only one more thing that can be a major drawback for some: it is only Windows supported. Think it through before making a choice.

4. Affinity Photo

Platforms: Windows,MacOS | Price: Paid

If you're looking for a pro photo editor like Photoshop, Affinity Photo is an excellent choice. Affinity Photo is sold at a budget price point, but it has the tools and the features and the power to compete with Photoshop head-on.

Serif has focused particularly heavily on the retouching market, with cloning, healing and retouching tools, an Inpainting tool for automatic object removal and a dedicated Liquify persona (workspace) for localized image distortion effects.

That being said, Affinity Photo's primary focus is photography, so it lacks a few of Photoshop's extra features (like 3D editing).

Other than this, Affinity Pro's main difference with Photoshop is how the tools are organised. It uses “personas” instead of workspaces and that might take a little getting used to for folks used to Photoshop.

It comes with layers, masks, smart objects, colour management, and both CMYK and RGB editing, as well as decent Raw file conversion. its filter effects can be applied ‘live' and its HDR tone mapping and workspace tools are excellent.

From focus stacking and panorama stitching to HDR merging and digital painting, it has just about everything you could want in a photo editor.

Like Photoshop, though, it's focused solely on in-depth, technical image manipulation. It doesn't have its own browsing and cataloguing tools and it doesn't do instant preset effects. Affinity Photo will bring the tools, but you have to bring the vision.

For just $50—or cheaper if there's a sale—Affinity gives users a surprisingly complete set of Photoshop-like features. but subscription-free, via a single extra-low payment.

As far as the learning curve is concerned, much like Photoshop, the tools in Affinity Photo are quite in-depth and will take some time to explore and learn. Luckily the interface is quite logical, and if you've used Photoshop before the tools will make sense.

5. Capture One Pro

Platforms: Windows,MacOS | Price: Paid

Capture One is a RAW image editor made by the camera company, Phase One. If you are a photographer who is mostly interested in enhancing RAW images, then this is a better option than Adobe Lightroom.

Capture One works both as tethered capture and editing tool for studio photographers with a 'sessions' based workflow and as a Lightroom-style image cataloguing, searching and non-destructive editing tool. It works in a single window rather than in Lightroom-style ‘modules' and has a highly customizable set of ‘tool tabs'.

One of the key differences is its layers-based local adjustment system which makes it much easier to see and edit your changes to your work, and this now includes 'parametric' linear and radial gradient masks which you can edit later. Capture One's conversions look smoother and sharper than Lightroom's.

Its raw conversions are sharper and less noisy than Adobe's, but it doesn't support such a wide range of camera raw formats or as large a number of lens correction profiles. It doesn't have Adobe's mobile apps and online synchronization options either, but it does offer professional-grade ‘tethering' tools for studio photographers capturing images via a computer.

Capture One Pro also has a better system for applying local adjustments, using adjustment layers and masks. It's expensive, but very, very good.

This RAW image editor boasts some features that set it apart from the other software solutions available. For starters, if you need to work with big volumes of photos that are more than 20 megapixel RAW files, you will be impressed with its speed. What is more, to help you work more efficiently, the interface boasts some great customizability which means that you can change the keyboard shortcuts and layout to suit your preferences better.

If you often work with layers, you will also love the fact that it does not become slower when you have too many layers. Plus, it lets you make several adjustments per layer.

Some of its other fabulous features that will help you to work more efficiently are its sophisticated color editing and annotations. Its sliders make it much easier to tweak the granularity, while the annotations feature lets you jot down ideas to ensure that you can collaborate smoothly with other photographers and designers.

You do need a relatively powerful computer to run Capture One Pro smoothly. The only real strikes against it are the fact that there's no HDR or panorama options, the steep learning curve, limited plugin support compared to other software, and the price.

The full-fledged version retails at close to $300. There's also a subscription option at $20/month ($15/month if you prepay for a year) – considerably more expensive than Adobe's Creative Cloud Photography Plans.

6. Gimp

Platforms: Windows,MacOS, Linux | Price: Free

GIMP is a free, open-source photo editing software that's easy to download and install on your computer. It has multiple features which help you with retouching photos, photo composition and picture enhancement. It also includes a built-in file manager.

If you're a photographer, graphic designer or illustrator with a limited budget, GIMP offers many powerful features that with other software you'd have to pay to use.

The user-interface takes some getting used to and isn't as refined as Photoshop, but as with any editing software, once you're familiar with it, movements become second nature.

Once you launch the program, you'll find a dedicated window that displays the image. You'll also see two floating docks: One with the toolbox and another for managing layers, paths, brushes, and more.

It's also completely customisable, with dialogues allowed to float anywhere on the screen. You can customize not only the tools available, but also your workspace's color, widgets and widget spacings.

All the essential image editing tools are there: noise reduction, cropping, colour adjustment, gradients, brushes, curves and image enhancements.

For blemishes, there is the clone stamp, healing tools and you can even apply changes to isolated areas.

When using a large display, or two monitors, you'll have an expansive workspace to edit your images. Icons in the toolbox represent specific tools, like Scale, Pencil, Paintbrush, Bucket Fill, Airbrush, Smudge, and more. You can apply numerous filters, too, such as dropping a shadow, adding a neon effect, adding a glass tile, removing devilish red eyes, and so on.

It can handle all the usual file types, including RAW, JPEG, TIFF, PSD, GIF and more.

Because GIMP is open-source, there's a very active community of users who have created plugins to add even more functionality to the program. However, despite a more user-friendly interface than past versions, Gimp offers almost nothing in the way of guidance, which makes it much more difficult to learn than other photo-editing software.

This free professional software for editing photos is another excellent Photoshop alternative for beginners. It boasts a variety of features that can assist novices with digital photo retouching and composition. With the help of features like vignette and corrective mode, you can also take your photos of any file format to the next level.

Gimp is good for starters and professionals with limited requirements. However, it is not an ideal option for pro-level editing work.

7. Paint.Net

Platforms: Windows | Price: Free

Paint.Net is an easy and convenient image editor with a clear and well-ordered interface. It offers you tons of Layers and filters, Plugin support but when compared with the GIMP, It is less powerful than GIMP.

With Paint.Net you can make some basic editing without deep changes and professional retouch. The software will come in handy for Social media marketing Specialists and Photography lovers who need to put pictures in order fast.

Paint.Net has a similar Adobe Photoshop interface. Tools like a magnifier, crop frame, color picker, and brushes are placed on the bar on the left side, history of editing and layers to work on - on the right side in different windows. All image editing functions are available in the Adjustments menu, including tools of Hue / Saturation and Curves.

These tools are usually used by professional photographers and photo retouchers. In this program, you can overlay layers, mix them, for this you need to choose a "Layers" palette tool. You can return to any stage of photo editing.

The name doesn't sound all that fancy. Although it sounds like Microsoft Paint, it is a dedicated photo editor. Albeit a basic one. It is easy for beginners as it has layers, unlimited history, and special effects.

Editing with Paint.Net is very fast and easy, even on older systems, despite the fact that it lacks some advanced tools. It is free, but unfortunately for Mac users, it is exclusive to Windows.

Sometimes it is important to work with a YouTube photo editor that does not include very many complex features. While going with this software, You see it's a quick, easy to work with and help you to create new look images.

8. Photofiltre Studio

Platforms: Windows | Price: Free and Paid

Photofiltre is not a widely known photo retouching program which won't cost you a penny, but it has plenty of features that casual photo editors will find useful.

As its name suggests, PhotoFiltre offers plenty of terrific filters and tools for enhancing images. There are filters for adjusting brightness, contrast, increasing and decreasing saturation as well as sharpening or blurring images.

It has a host of artistic filters, too, including textures, watercolor, pastels, sepia tone, black and white, night and sunlight effects and emboss. It even has a puzzle effect.

The program doesn't offer layers, though it does allow you to put text over an image. Many don't use layers anyway so, for them, the lack of this feature is no loss.

Whatever filter you apply it can be undone. It also can be faded. So if the original effect is too strong, you can reduce the amount via the Edit menu.

PhotoFiltre includes an Image Explorer, which is accessed through the Tools menu. Open any image folder on your hard drive and its contents are shown along the bottom of the window. Simply double click on a photo to open it and begin editing.

You can do automated batch processing of any number of photos. Select the Source and Output folders and file format such as JPEG, GIF and TIFF. Next select the image size and if you want a frame automatically added to the images. The size and color of the frame can be adjusted.

During the batch process, brightness, contrast, saturation and Gamma correcting can be applied to photos. You can apply a few filters such a sharpening and scanlines, and rotate or flip images. The batch process is fast and easy. Since not all photos need the same amount of processing, do a test run to see if the results are to your liking.

An advanced version of PhotoFiltre , called PhotoFiltre Studio, is also available for a nominal fee. Unlike the free version, PhotoFiltre Studio has layering capabilities. It is shareware and can be tried for a 30-day period.

9. PhotoScape X

Platforms: Windows, MacOS | Price: Free and Paid

Photoscape X is an incredible photo software editing program that people from all around the world can use; it's compatible in a number of different languages.

Using Photoscape is ‘easy and fun'. it allows you to easily edit photographs taken from their digital cameras or even mobile phones.

Although the Photoscape editor does not have a lot of advanced editing tools, the app is best used as a quick editor. It contains essential tools that allow you to apply filters, frame, crop, add text, draw, clone and so on.

Photoscape is stuffed with a lot of features while retaining its ease of use. It has just about any tool you might be looking for – white-balance correction, color correction, brightness and contrast, etc.

The app's features include a raw converter, file renamer, batch processor, viewer, color picker, screen capture tool, and print layout tool.

It even has a GIF animation, and will convert your RAW images to JPG. You can also customize your toolbar into the features you use most, combine and split images, and make slideshows.

Original photos can be edited using the one and only Magic Color with Photoscape X. Plus, over 240 features and over 1,000 patterns are easily accessible. It also boasts some really cool Instagram-like filters, frames and vintaging options.

The only real downside to Photoscape is that it runs ads for other “recommended” software – the price you pay for “free.”

PhotoScape is one of my favorite tools for post-processing, mostly because it has a friendly UI and quick editing features. It is one of the better free photo editors out there, and it's well worth checking out.

10. Darktable

Platforms: Windows, MacOS , Linux | Price: Free and Paid

Darktable is an open-source photo-editing application that allows you to enhance raw images. It also happens to be one of the only free image editors that doubles as a space to store and organize your photos. This app enables you to automate repetitive tasks. It also allows you to manage color with no hassle.

You can add tags to images, rate them, organize them into folders, and mark them by color. It also allows you to create and save your own presets, making one-click editing a breeze.

The interface is almost identical to Lightroom's, with the ability to quickly toggle between your photo library and editing tools. The main photo editing workspace is clear and straightforward, with a well-designed and friendly interface for something that doesn't command a price.

You view your files in the ‘lighttable' tab, with editing taking place in the ‘darkroom'. Under ‘other', you have map, print, slideshow and tethering modules, all of which load near-instantly.

There are some very powerful tools to be found. For example, lens and perspective corrections come as standard. also, there are surprising additions such as tethered shooting, selective colour correction, snapshots, multiple moveable masking options, and a completely customisable workspace. You can even add third-party modules.

You are not restricted to jpgs, as Raw files are easily and automatically converted. Darktable also offers non-destructive editing, allowing you to convert back to your original image quickly and easily.

DarkTable tends to fall short in accurate camera profile matching. Still, contributors do a great job in offering support for new cameras and lenses – the automatic lens correction is particularly impressive, and rivals any paid software.

There aren't enough tools for professional photographers, and Darktable can get buggy and crash if files are too large. While the tools offered are similar to those in Lightroom, it does fall short in its ability to handle professional color manipulation.

Although it doesn't offer all of the advanced tools of Photoshop, it does a great job as a free Lightroom alternative. It's a good starting point for beginners. There are no adverts or annoying, locked premium features.

Online Photo Editors List

From adjusting just the basic brightening of the image to the more complex adjustments like taking wrinkles and lines off of our faces and correcting our smiles and our bodies.

We live in a fast paced world of social media today and are in constant need of finding ways to edit our images. It's always convenient if we can find something that is online so we don't really need to download too many apps on our systems.

I have put together a list of web based editors that are easy to use and will help you get your basic image adjustments done to perfection.

11. Pixlr

Platforms: Web browser-based | Price: Free and Paid

Pixlr is a free photo editor that's 100% online. This is great for people who are wary of downloading free programs onto their computers. This works with HTML 5 rather than flash, so no unnecessary downloads on your end. I chose this editor because it works seamlessly with machines that do not have a lot of space (example: Chromebooks).

Pixlr offers a Chrome App that connects to Google Drive. No account is necessary to use Pixlr; you only need to create one if you want to use the Pixlr Library with free cloud storage.

The crowded toolbar reminds us of Photoshop. This photo editing tool includes most of the common photo editing tools such as: magnifying glass, lasso, dropper, pencil and paint brush. It also features a red eye removal tool and a color palette which you can use to fix the color of your image. To add more versatility, you can work with layers.

With the retro vintage editor, you get access to three settings. Each of the settings has a side scrolling list of effects you can use to customize your image. However, whether you use the vintage or basic photo editing tool, you can come up with a high-quality image.

With it, you can create clean canvases, on which you add your photograph. I was impressed by the number of tools that this photo editing software has to offer, everything from standard options, to unique effects and layering features.

A handful of filters such as HDR, glamour glow, and vignetting offer quick and easy ways to improve your photographs. With this photo editor, you can make finely detailed changes to colors, saturation, and vignette effects. On top of these, sharpening and blurring your images is a breeze.

When you go to Pixlr's website, you can choose to use Pixlr Editor or Pixlr Express. Pixlr Editor enhance your image with Free Photo Editing Software features that are similar to Photoshop like cropping, resizing, and changing the colour of the entire image. while Pixlr Express suited for applying filters, texts, and other overlays effects to a photo. The desired Extension can be applied to save your edited image as JPG, PNG, BMP, TIFF, and PXD (layered Pixlr image).

Pixlr offers a free version. However, it is cluttered with ads, which is a major distraction for any photo editing professional. Pixlr is right now offering substantial discounts on its pro subscription plans. You can get a monthly subscription at $5 and quarterly at $12.

12. Photopea

Platforms: Web browser-based | Price: Free and Paid

Like Pixlr, Photopea is a photo editing program that works completely online. This means you won't need to worry about downloading any software onto your computer.

Photopea supports numerous file formats, including PSD, XCF, CDR, etc. making it great for photographers, graphic designers, and graphic artists.

This one could win the hearts of many, as it is internet-based and completely free. If you give Photopea a try, you'll see that it is super similar to Photoshop in many ways.

Of course, Photopea doesn't provide all the functions that are present in Adobe software. But its feature set is extensive enough to satisfy users, especially those, who aren't willing to spend much on the subscription.

The Photopea offers a wide variety of image editing tools, including advanced features like spot healing, a clone stamp healing brush, and a patch tool. The software supports layers, masks, smart objects, layer styles, filters, vector shapes and masks, and more. A full rundown of Photopea's tools is available on the app's website, as well as tutorials for select basic activities.

Unlike Pixlr, Photopea doesn't offer an image library. If you close your browser without saving, you'll lose your work.

It is one of the best photo editing app for PC that works for both vectors as well as raster graphics. It is equally suitable for complicated procedures like web-page design, making illustrations, editing pictures and simpler ones like changing the size of pictures.

Photopea is free, but in exchange you'll notice a lot of ads around the interface. If these are too distracting, you'll need to pay $9 a month to get rid of them. At this price, you could nearly be paying for an Adobe subscription.

13. Fotor

Platforms: Web browser-based | Price: Free and Paid

If you're looking for a tool that simplifies the photo-editing process, then you will definitely love Fotor. This application can be used with no knowledge. It allows you to drag and drop images. It's one of the simplest tools that you could ever use that doesn't forfeit in terms of editing options.

Do you want to tweak your color balance, brighten the image or simply crop your composition? With Fotor it's easy-peezy. A few other editing options include the possibility to add borders, frames or effects such as scratchy pencil or the look of paper.

some of its main features include: design templates, filters, HDR effects, and portrait retouching. Alternatively, if you are looking to create a bit more informal design, there are countless shapes, fonts and stickers that you can play around with.

This online photo editor and collage maker also comes in a full-fledged desktop application. Moreover, it supports RAW photo conversion, which is a valuable feature for free software.

The software also comes loaded with image enhancing tools, including numerous filters to create stunning images. Its user interface is quite simple to use and offers stunning one-click filters, which can enhance your images instantly.

In case you don't like the software's interface, you can simply customize it and swap things around by changing the theme.

The cloud-based software allows you to save the incomplete designs for future editing. That way, you can start from where you left the work. All you need to do is upload your images onto the website and you can start editing, creating designs and more.

For the free photo editor, you are limited to working with 4000px images. This resolution is something most enthusiast or hobby photographers won't have a problem with but can become a hindrance to larger images.

This well-known cloud-based software boasts more than 300 million users already. Fotor is the ideal tool for photographers who don't have a lot of experience with post-processing, or who want to preserve the original quality of their digital imagery. But it will not satisfy you if looking for professional photo editing or adjustments.

14. Befunky

Platforms: Web browser-based | Price: Free and Paid

Befunky is very good online photo editor with lots of stunning picture editing options. It's used for making basic photo enhancement and color correction, create collage and graphic design. This app enables you to crop and resize photos with ease.

There are 10 modules for image editing, which are organized in the form of a side panel. I like that you can create layouts of your works, import images, customize them as you wish, and then change the layout without overloading the pictures.

It works especially great with collages. Create a simple collage is very easy. There are hundreds of great photo collage templates, but the problem is that most them are closed for free use.

If you have a specific area that needs retouching, the tool has a variety of options for taking your image to the next level. It's simple, easy to use, and performs well in your web browser.

BeFunky also has another cool feature, called Graphic Designer, which allows you to create brochures, posters, social media posts, and even your own templates, right in the app. While it may lack certain professional features, such as editing layers, can't open RAW pictures. you won't find a more efficient option for getting high-quality, creative images in little time.

The best feature, though, is the AI image enhance button that does a pretty good job for you in just one click.

However, most of the features are chargeable, so you will have to spend some amount of money to use all of them. But you will be able to do the basic editing of the image, with features like crop, resize, rotate, exposure, beautify, smoothening and blur, free of cost.

This is a great option for beginners, but for more advanced users, the functionality and capabilities won't be enough. Moreover, the free version of the image editor comes with more than 30% of limited tools and constant intrusive advertising. I would choose this software if I could access art effects free of charge, since they are fantastic.

15. Canva

Platforms: Web browser-based | Price: Free and Paid

Canva is a free photo editor that runs in your browser and is perfect for turning your images into other business assets like social media posts, brochures, presentations, and more.

This online design tool offers a ton of powerful editing features, including a drag-and-drop design tool and millions of stock photos, vectors, and illustrations.

You won't find advanced tools here. For clone brushes and smart selectors, you'll need to look elsewhere. But, you will find sliders covering an array of adjustments.

With Canva, you can easily edit photos using preset filters or get advanced tools like tints, vignette effects, sharpening, brightness adjusting, saturation and contrast, and more.

I was amazed at how easy it was. You can edit right from the browser! Upload your image, play around with the filters, and download your photo. It's really that easy.

Whether you simply want to crop or straighten a photo or want to get creative with textures, fonts, badges and stickers, Canva can help. Some of its other features include vignette, photo blur, a speech bubble maker, an image transparency tool, photo frames and design grids.

Though, if you do not know where to start, be sure to visit the Canva Marketplace where you can find more than 8000 templates. Its basic features are available free of charge, but the more advanced features must be paid for. If you need to edit on the go, you will be happy to know that you can download it to your smartphone.

If you want to build a consistent presence around your entire business—from product photos to marketing assets—Canva's got you covered.

This web browser free editor software is a perfect place for changing your images into gifts, either for yourself or family and friends. Cards, posters, and invitations are easily created if you don't opt for social media stylings.

There are upgradable options other than free software. Canva for work comes in $12.95 and gives you access to thousands of stock images and unlimited storage. All of which is handy for your business.

Do I need a graphics tablet for photo editing?

When I first started editing photos in Photoshop, I used a mouse on my desktop and laptop for everything, from drawing complex masks to painting contrast into the sky. It worked, but it was difficult to do accurately and caused a whole load of hassle. It took me some time to make the leap and go from using a mouse to using a art tablet for photo editing, but once I switched to a Photoshop tablet, I have never looked back.

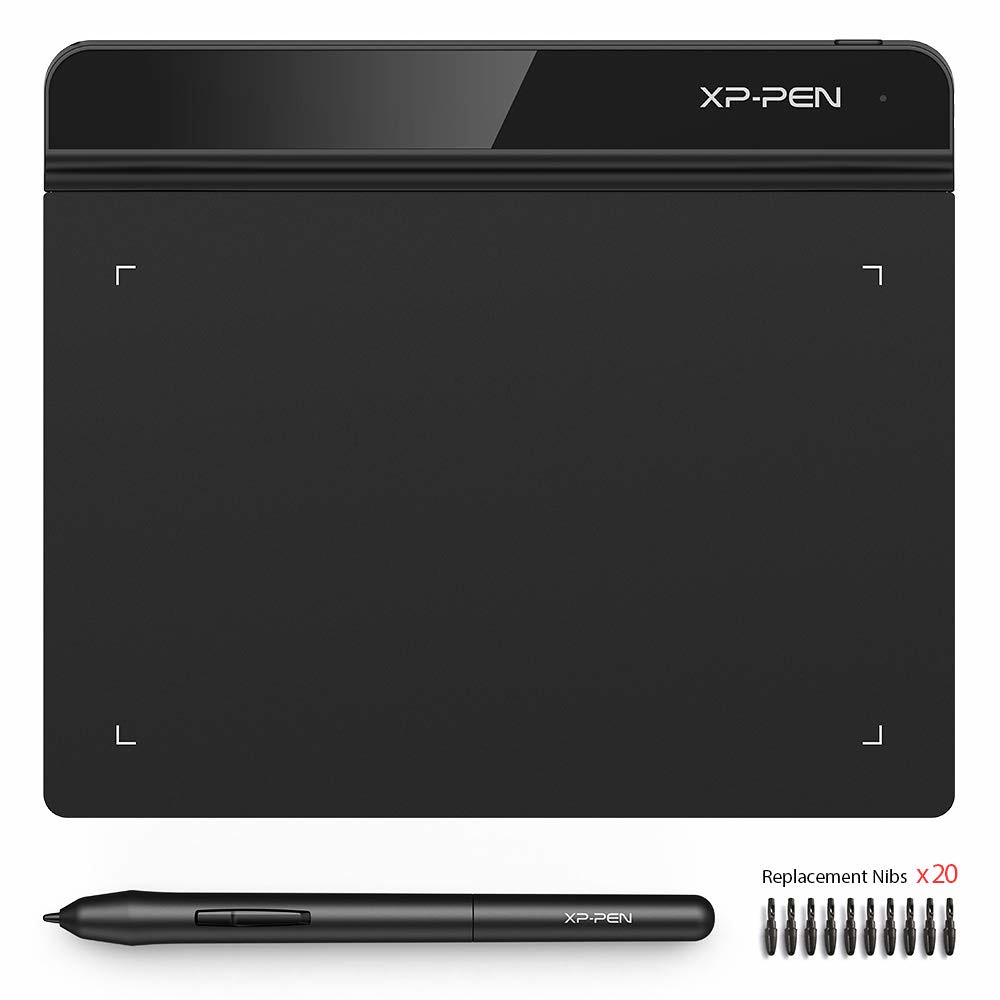
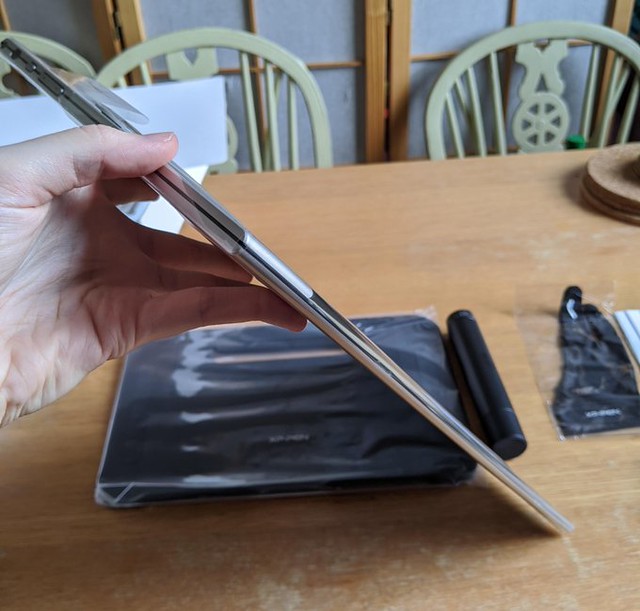
My first run-in with a pen and tablet for Photoshop was in 2018 with a XP-Pen Star G640 Tablet. I can still remember getting it. It felt awesome to use but was also very difficult to get used to. At first, I used it for everything because, well, I could! After a while, I realized the pen and tablet are just tools for post-production and it doesn't need to be used for everything. There are two main tasks I use my pen for while I edit.

Before I discuss what I use them for, let's take a look at why I use them.

The pen and tablet is kind of like a mouse with one very special characteristic that makes it stand out, pressure sensitivity. When you are using a brush in Photoshop with a mouse what you click is what you get. What I mean is, whatever brush presets you have set, the brush will respond with. Sometimes that means you will get a harsh line and the only way to make it less abrasive is to lower the opacity. However, you can only have one opacity set at a time, right?

Wit a pen and tablet things are a little different. A Pen and Tablet will use your hand's pressure on the tablet to respond with the appropriate opacity, flow, or size. So, the softer you brush with your pen, the smaller or lighter the stroke will be. The harder you press, the darker or larger the line will be.

As you can see in the photo above, with the mouse, what you click is what you get. With the Pen and Tablet, you have a lot more versatility and all with the delicate stroke of the pen on the tablet. This give you a ton of control when you are editing your images.

I primarily use the pen and tablet for two things in Photoshop, Masking and Dodging & Burning.

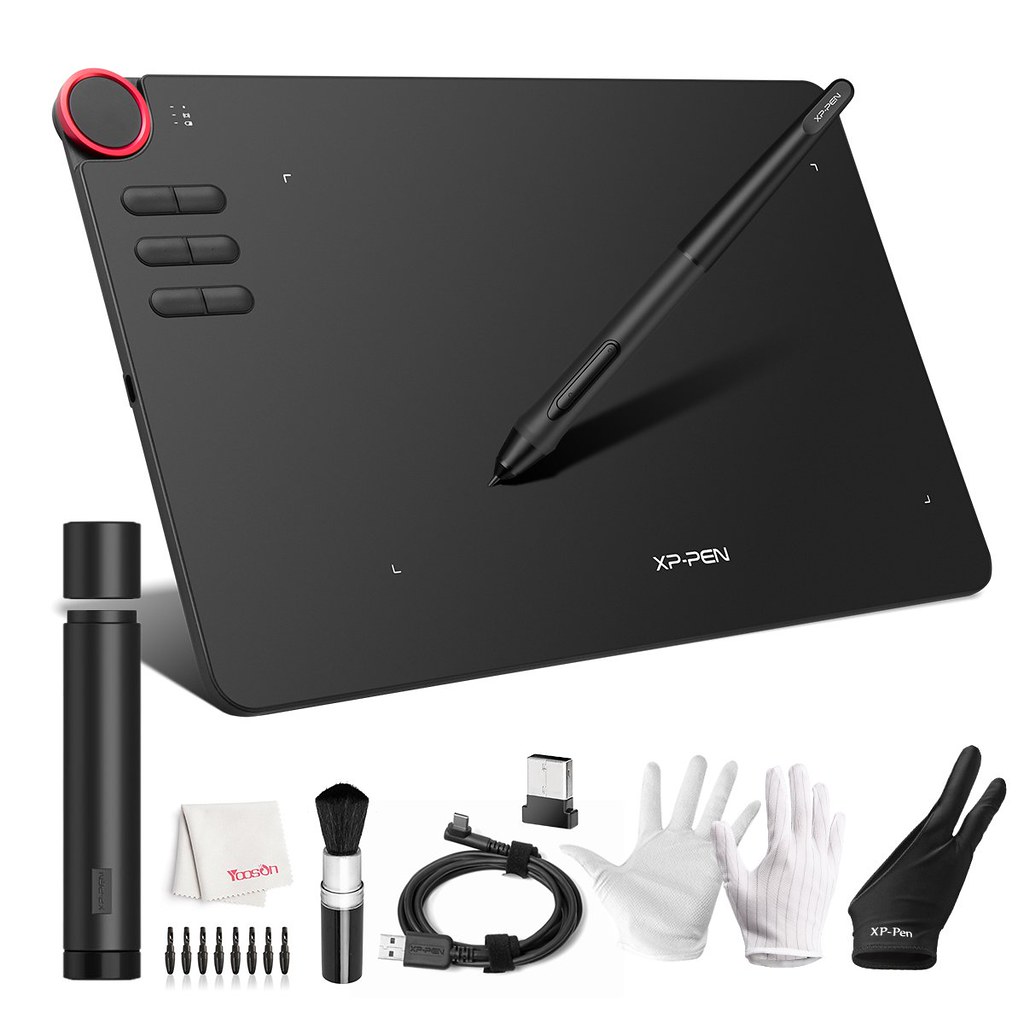
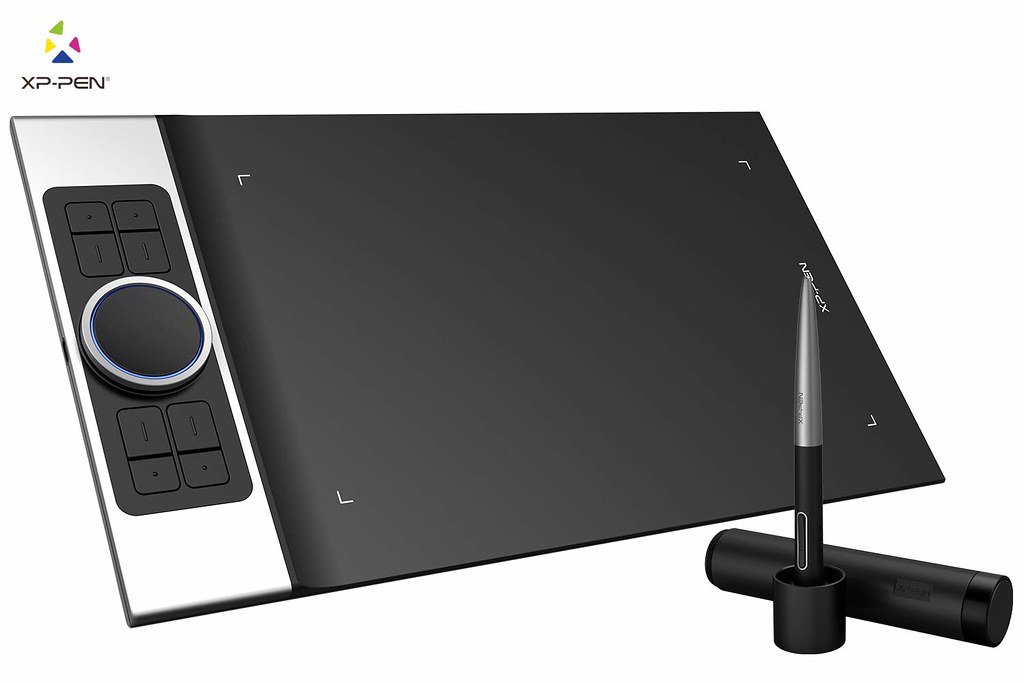
You may have heard of a pen and tablet before. The term Wacom is almost synonymous with the pen and tablet. However, other brands such as XP-Pen also offer a wide range of options with an equally wide range of features. Where they differ significantly is price. xp-pen tablet is about at around a third of that of the same wacom model.

The entry level XP-Pen Star G640 has only 6 by 4 inches of the active working area , but this will still be sufficient for most home users and those starting out with their photo editing, making the Star G640 the best beginner drawing tablet. I would recommend the small size as sufficient for most users, although there exists of all sizes from A7 to A3.

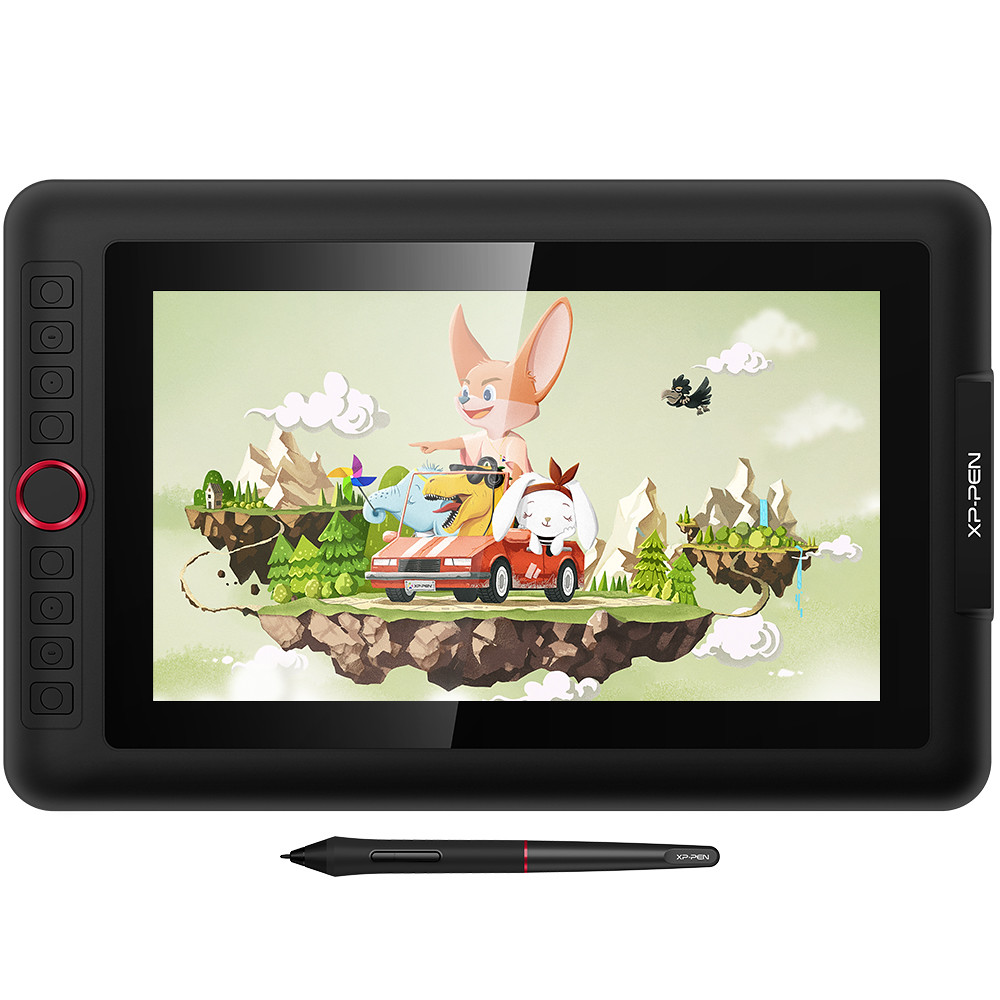
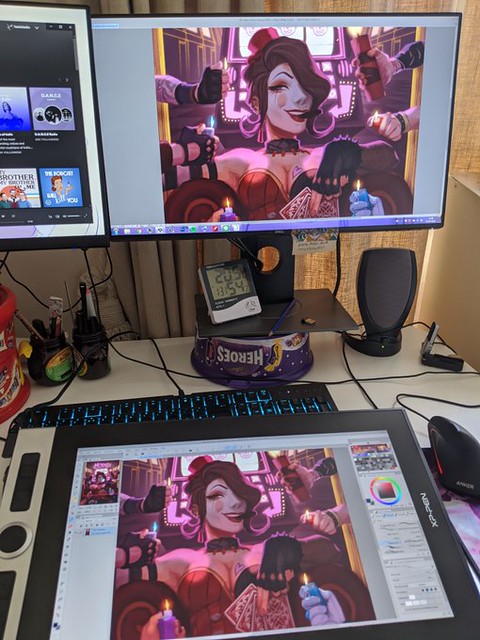
When looking for the best pen pad for Photoshop, you need to make a personal decision on whether you want a drawing tablet with a screen or not. You definitely don't need a graphics tablet with a screen, but they can improve the accuracy of your Photoshop work, depending on your technique. If you do want one, you will be looking at a significantly increased cost, although it is possible to get a relatively cheap drawing tablet with screen, such as the XP-Pen Artist 12 Pro , if you are more budget limited.

The XP-Pen Artist 12 Pro is an excellent budget drawing tablet with screen. Technically, the pen pressure and accuracy are on a par with Wacom, although in real-world practice the Wacom tablets come out on top. There are many more models in the XP-Pen Artist series if you have more to spend and are looking for a larger screen.

Conclusion

There are many photo editing software's on the web ,depend on what type of photo editing you usually do. Whether you are a professional or beginner, you can use any of these photo editing tools.

Choose the tool that not only appeals the most to you but is also very easy to use and enables you to achieve desirable results.

Now that you have a good understanding of the top paid and free photo editors out there, it's time to get testing! If you don't want to spend money on a photo editor, start with a free one or a free trial, then take it from there.

Not all software is meant for everybody. For example, Adobe Photoshop needs months/years of practice to become an expert.

However, other software like Canva, Fotor, etc. are browser-based, and they need you to be familiar with their layout. Of course, you needn't be a design expert to get going with any of these.

We hope this article will help you pick the best photo editing app for your computer. Check the pros and cons and go to the official website to download the chosen software!

this article was just my opinion. You should try them out and judge for yourself. Hard work pays off and results will come in no time! Happy Editing!

Leave any questions or suggestions below !

Source: https://www.xp-pen.com/forum-1790.html

Monday, February 1, 2021

Top 12 Best Android & iOS Digital Drawing, Painting and Illustration applications


Digital Drawing & Painting are fun . A person uses all his imaginations, innovation and creativity to draw a master-piece that eventually reflects his set of thoughts. Visualizing a certain thing and then picturing it in a canvas is a big art in itself. Drawing a picture freshens up one’s mood, makes a person more positive and lively and therefore this activity is very fun to indulge oneself in.

Becoming a professional digital artist takes years of hard work. Achieving this goal is impossible without spending thousands of hours practicing and polishing your skills. Drawing apps for Android & iOS enable you to keep practicing your drawing and painting skills whenever you have some free time.

There are plenty of drawing apps are available in the market for all kinds of devices. Irrespective of whether you are using an Android device, an iPhone or even an iPad Pro, there are drawing apps for everyone. Drawing apps for Android & iOS devices have come a long way from being a basic sketching app a few years ago to full-fledged drawing software. They come with all the advanced features which you will find in some of the pro level desktop apps.

If you want a digital art drawing tablet to connect to your Android devices as well as computers . some models ( Star G640s,Star G960S , Deco mini7, Deco 01 V2 and Deco Pro ) of the XP-PEN sports great pen pressure sensitivity and transmits your drawings to the connected Android smartphones and tablets using Android OS (6.0 or later). For a dedicated tablet for doodling or professional art, XP-PEN is a reliable brand to being your search.

Here are some of the best and well-known art apps for beginners looking to get into the digital world. These are the drawing apps that are quick to pick up and easy to work with. They have a lot of great resources available and a large community to lean on for support while traversing the learning curve.

The 12 Best digital Art Apps for Android or iOS that artists will love

1. Procreate

Procreate is an iOS-only app designed to fully harness the power of Apple’s popular iPad Pro and Apple Pencil combination. There is a Procreate app for the iPhone with fewer features called Procreate Pocket.

It's a classic and well-known app that won the Apple Design Award. Its wide canvas with touch operation ensures a comfortable drawing experience. The simple UI makes it easy to find features.

It features the ability to use a 4K canvas with over 120 brushes available. On top of that, there are 25 customizable settings for every brush resulting in a nearly unlimited number of combinations. On top of that, there are an absurd list of other features you can use including various import/export settings, 250 levels of undo/redo, optimizations for 64-bit processors, and plenty of deeper functions such as exporting HEX values for color.

From transformative tools to video capture of workflow, multi-touch gesture commands and GPU accelerated filters, Procreate offers impressive performance to artists.

You can create just about any kind of art with Procreate, from oil and acrylic style paintings to pixel art, lifelike graphite drawings, digital illustrations, and so much more.

More than just a drawing app, Procreate combines many of the powerful tools you’d expect to find in a much more robust program like Photoshop. Layers, custom brushes, and all sorts of special effects are available on your tablet.

You can export your ended up work of art as PSD, native.procreate, TIFF, transparent PNG, multi-pages PDF, and JPEG file formats.

Procreate offers impressive performance to artists. It's overkill if you're just looking for something to doodle with, but if you're in the market for a robust, professional-quality art app on an iPad, Procreate deserves a look.

2. Adobe Illustrator Draw

Be sure to check out Adobe Illustrator Draw if you use an Android or iOS tablet. Adobe Illustrator Draw has full layer support, much like its desktop counterpart.

The free Adobe Illustrator Draw is a versatile vector graphics drawing app that can be further enhanced with Creative Cloud integration. It supports zoom as much as x64, so you can easily see all the fine information.

You can mess around with five customizable pens and stylus support for popular devices such as Adobe Ink. support for Adonit, Wacom, Pencil by 53 and Apple Pencil devices. You can also enjoy the ability to create up to 10 layers to create images on the app. Easily mixes photos with drawing layers.

Users can import in assets from Color CC and Shape CC, and can export drawings straight to Illustrator CC on the desktop, or PNG files to Photoshop CC. That allows you to begin a creation whenever inspiration takes you, and then flesh it out fully on a desktop rig.

The app is beautifully laid out with a simple approach to Adobe Photoshop Sketch, though the learning curve can be challenging for those who are unfamiliar with design software. The upside: the app features a robust tutorial platform and community engagement available for all users and skill levels.

3. Adobe Photoshoop Sketch

If you’re looking for a free app that combines the ease and simplicity of drawing on your mobile device with the power of Adobe Photoshop, check out Photoshop Sketch. It includes many of the same features as Adobe Illustrator Draw , including zoom support for fine detail, support for various drawing hardware, layers, advanced tools, and more.

The app is quite intuitive because it’s well laid out for use on a tiny screen. You can easily select brushes, color palettes, new tools, and make quick layer adjustments.

With a myriad of drawing tools and customizable toolbar, this app can turn your concepts into incredible and realistic artwork and designs. You can make use of tools that imitate an ink pen, marker, as well as a graphite pencil.

If you’re fond of using a stylus while drawing, Photoshop Sketch can work well with you since it supports Bluetooth styluses such as Pencil, Adobe Ink, and those from Wacom and Adonit.

Photoshop Sketch aims to replicate the analog drawing experience, augmented with a few digital flourishes such as a color picker and an undo history. Users can import in assets from other Creative Cloud tools such as custom brushes and colors, and your creations can also be exported into Creative Cloud as layered PSDs to Photoshop, or flat images for Illustrator.

You can also get rid of the menus completely so you can have your whole screen to draw on. Then bring ‘em back when you’re ready to adjust something.

This is truly a beginners app but it’s also the ideal choice for Photoshop artists who want a slimmer version of their favorite digital art program on the go.

4. Autodesk SketchBook

SketchBook by Autodesk is one of the most powerful and popular drawing apps for Android and iOS. Additionally, Autodesk made SketchBook entirely free. That makes it arguably the best free drawing app on the Android and iOS, with no ads or payments required. Apart from Android and iOS, the app is also available on Mac and PC.

SketchBook stands out from similar apps due to natural drawing experience , clean interface and consists of the unique Copic Color Library. It comes with a variety of drawing tools and brushes, all of which you can customize on the fly, pinch to zoom, a gallery organizer, and support for saving and storing your works to Dropbox or iCloud.

SketchBook also has a Scan Sketch feature, which lets you capture a sketch using your device’s camera, and it automatically makes the background of the paper transparent. This way, you only have your drawing to deal with. Many industrial designers, architects and the like have integrated this handy little tool into their workflow for easy drawing and quick transition into the Autodesk family.

There’s also a screenshot tool that allows other people to view and add notes to your artwork for review. If you wish to create flipbooks or animations, SketchBook has got you covered. Simply click on File > New FlipBook then choose any of the options to enter Animation mode.

Autodesk SketchBook basically works like a sketchbook for your mobile device. You can use this for practice and to work out ideas, but not really to draw your finished pieces in. Sketchbook isn’t meant for fancy finished pieces so it’s not a true painter’s app. But it’s great for quick sketches and working out concepts from anywhere in the world.

The application also lets you export your work as JPG, PNG, BMP, TIFF, and PSD. Lastly, Autodesk SketchBook has complete support for layer features.

In addition, users can create a free Sketchbook account to gain access to more features such as layer and symmetry tools. A premium subscription unlocks more pro tools such as an expanded brush library, and more powerful layer and selection tools.

5. Ibis Paint X

If you’re searching for an app that’s easy and enjoyable to utilize for both kids and grownups, look no more than Ibis Paint. ibis Paint is the of the best drawing apps for Android and iOS out there.

It has some unique features like recording your drawing as video, and SNS features where you can see and learn from videos other users have made.

Other features like fast open GL technology, 335 customization brushes, , 46 screen tones, 27 blending modes, and over 1,000 fonts makes it an obvious choice for people looking for an android or iOS drawing app with lots of plus points.

It does have layer support and you can use as many layers as your device can handle.

Apart from this, there are separate features for those artists who are interested in creating manga. the app works great with concept art, anime/manga, or any type of illustration work.

There is also optional pressure sensitivity and you can load images to trace with the easy tracing mode.

On top of the above functions, Ibis Paint offers stroke stabilization function and different ruler features.

ibis Paint X makes it easy to create beautiful art on a small smartphone screen. You’ll find great linework for drawing on a small screen.

While Ibis Paint X is a free download, an in-app purchase removes advertising, and an optional Prime Membership subscription unlocks extra fonts, materials, and filters.

6. Medibang Paint

MediBang Paint is a free drawing app available for Android, iOS, and PC/Mac computers. The mobile and desktop versions do feel a bit different so try both and see what you think.

The app comes with the features you'd expect from a solid mobile art app, including layers, rulers, a wealth of brushes, and snap guides and tracing aides. also support for 3D Touch on newer iOS devices.

The app makes it easy to create drawings and comic books and is packed with features such as brushes, screen tones, fonts, premade backgrounds, comic panels, and other resources.

It uses cloud storage by default so it’s easy to transition between your devices and continue working on the same piece. This means you can also easily share your artwork with others for collabs.

What’s more, the app has a vibrant community so there are plenty of resources and tutorials online that will help you learn the ropes quickly.

Due to its mild complexity MediBang Paint might not be the best for beginners who have never used digital drawing apps before. But if you have some experience you’ll probably really like it.

The app is free to download on the Play Store and App Store. However, the free version showcases ads from time to time. Purchasing the Remove Ads option will eliminate these interludes.

7. Infinite Painter

Infinite Painter might not have the easy name recall of Adobe, Autodesk or any of our other best drawing apps, but it's garnered a well-deserved cult following among Android users.

The app is free with a 7-day trial, after which premium features are available as in-app purchases. While originally an Android exclusive, Infinite Painter has since made the leap to iPad screens, operating under the same free trial model.

Infinite Painter features 80-plus natural brushes and the ability to create custom ones, infinite layer support, paper textures, a variety of transformation tools and perspective aids, color blending, pattern and gradient tools and more. Works can be exported into PSD, PNG or JPG.

The well-designed layout makes it simple to change brush sizes and color choices quickly. You can also sample colors from anywhere in your paintings.

The minimal layout is designed to keep your drawing space clear so you don’t get lost in menus to find what you need. Infinite painter also makes it easy to see which tool you have selected, because it’s the only one you can really see.

Use layers, create masks, add symmetry tools, and work with selection tools similar to what you’d find in Photoshop. You can even create your own brushes and modify the ones that come with the app. And when you start a painting you can record a video of your process to create your own speedpaint videos.

Infinite Painter is tailor made for sketching and painting on your phone and tablet. Its built-in brushes are incredibly diverse and work like actual paint on a digital screen. It feels very natural for anyone with painting experience.

8. ArtRage

The concept behind ArtRage is to make the experience of painting as real as possible on the Android and iOS . You can experience the mixing of different paints like you are blending them on a real canvas.

ArtRage delivering a set of drawing and painting tools firmly rooted in the analog art of applying graphite on paper or paint on canvas. It features a series of tools that aim to mimic real world painting tools and mediums, such as oil paints, watercolors, a palette knife, paint rollers, etc. The painting engine is designed to mimic the effects of paint thickness, thinner and other real-world behaviors of tools and media.

The canvas textures are beautiful so it looks like you’re painting on actual canvas. You can even customize your paper to get the exact texture and line quality you’re looking for.

As this app also works with layers, you won’t face any difficulty with the blend modes if you know Photoshop. You can also save your strokes for watching later on your desktop.

This is a brilliant program for traditional artists who want to continue working in their style, but with the benefits you get in digital art(ex: undo, painting over layers).

You also get a full set of stencils, grids, and perspective guides to speed up your painting process. You can tell ArtRage was created with artists in mind. ArtRage supports Apple Pencil, Adonit, Wacom and Pogo Styli.

As for the interface and workflow, ArtRage is an easy-to-use application. Even someone who is not familiar with the app can swiftly grasp the gamut of it. It also has built-in quick reference and essential help files, including multitouch support for canvas and object manipulation.

With ArtRage you can create gorgeous paintings and drawings that perfectly emulate working on a desktop computer. Due to all these reasons, ArtRage is hands down one of the best drawing apps for Android and iOS.

9. Dotpict

Are you trying to create a piece of art that is different from the rest? Or are you someone who just enjoys the world of pixel art? Dotpict is one of the best drawing apps for Android and iOS as it offers a different take on drawing. The app is free on the Play Store, the App Store, and has ads. In addition, this artsy app is also partly a game.

You get a solitary brush with a couple of chosen hues. Utilizing this application is somewhat similar to testing yourself. On the top bar you get couple of menus to play out some extremely straightforward assignments. Directly underneath it is the illustration zone.

You get a square canvas with a customizable layout. This is trailed by a lot of various shaded pencils and toward the end we have the push catch. The tools in the app include a brush tool, an eraser, a color picker, a bucket, and a complete color wheel. Just point the cursor to a pixel and tap the big button to fill it with color. Apart from that, dotpict also allows users to undo or redo the steps.

Move a small hand with your finger or stylus, then push your color to create an 8-bit shape. There's a variety of canvas sizes, so you can create anything from a small figure to a whole landscape.

Maybe you just want to browse around and get some ideas on what to do next. Dotpict has a great gallery for you to peruse the creations of similar artists so you can take an idea and turn into something of your own. All of your work is automatically saved, and you can easy share or export it once you've finished.

You can directly save the project to your Photos app or share it within the app or to your social media.

Other than that, it’s not too feature heavy and it stays out of your way while you draw. It’s an excellent app for those who enjoy creating pixel art.

10. ArtFlow

If your Android tablet isn't feeling the love with all of these iPad apps in the running, don't lose heart. Artflow is a beautiful drawing app for Android that features a clean user interface and lots of pro features like layers and custom brushes. It is the perfect drawing and painting app to create paint your dream.

The ArtFlow digital art studio for Android comes packed with features and tools, both in free and paid tiers. ArtFlow's free version is already a solid drawing app, with nine customizable brushes, a symmetry tool, color picker, six-step undo and support for two layers.

A premium version massively expands the tool selection from the free dowload, with more than 80 brushes, expanded history support, the ability to create up to 16 layers, GPU-accelerated paint engine, stylus pressure support and custom palettes. That premium version has more features than any normal user would probably know what to do with, but it's great for seasoned and aspiring digital artists looking for an Android art app.

You can export to JPEG, PNG, or even PSD so you can import it into Photoshop later. To top things off, you’ll have access to Nvidia’s DirectStylus support if you’re rocking an Nvidia device. It’s a solid all-around option for both kids and adults. You can download it for free to try it out. ArtFlow is also free to use if you use Google Play Pass.

11. PaperColor

PaperColor is one of the most versatile photo editing and drawing app for Android devices. It is equipped with lots of professional tools for sketching and provides stunning system UI with easy controls. It includes both drawing capabilities and photo editing functionality with just some tap on your mobile devices.

PaperColor aims to imitate real-life drawing experience as closely as it can. It offers the necessary features that include different brush types, ruler, eraser, etc.

Different types of rulers makes each line you draw is perfectly straight or curved, depending on your needs. The paintbrushes this drawing app offers can imitate graffiti, a pencil drawing, or any type of doodle, as you can choose from a variety of paintbrush styles.

While most apps try to give you a modern, minimal UI, PaperColor lays the pens and brushes out in front of you. It's as close to an easel and canvas as you can get from an Android app.

It allows you to import a picture as the base map and set it to transparent mode. Then you can trace the original image and draw above it. A base map helps you to learn drawing in a straightway.

Moreover, other features include the ability to add text, custom cover, graphics tools, etc. You can add a handwritten signature to each image you create with this app, and share your creations with your friends on social media.

The app is free with no ads and has some in-app purchases. It is one of the best Android art apps that are worth trying for budding artists. Learning the basics of digital drawing and painting is much easier with an app like PaperColor that offers a base map.

12. Corel Painter Mobile

Finally, it's worth considering an offering from another publisher with desktop art package experience: Corel Painter Mobile is aimed at all levels of artist, with options to paint photos, trace, or start from nothing. and it intends to become one of the best drawing tools available for mobile devices.

With Corel Painter Mobile you can draw and develop your artistic work from almost anywhere.

Among the options offered by Painter Mobile, the following are included: Painting and drawing tools that allow us to make interesting sketches and easily color in images; Different sorts of brushes, pencils, and pens.Includes effects to be applied; Possibility to import images from the camera, gallery or Google image searches; Capacity to work with up to 20 layers.

You'll find the usual paint, blend, eyedropper, and paint bucket tools. Free version includes 16 brushes. paid version includes 70 natural media brushes. There's also integration with Samsung's PENUP social art network.

One of the greatest advantages of this software is that it allows you to import files created with the desktop version. Thus, you'll be able to continue working on your projects and show them from wherever you are.

Final Words

Producing digital artwork from an Android & iOS OS device has never been easier because there are so many different apps that enable you to draw or paint from your tablet or Smartphone. The majority of the drawing apps we included in this article can be used just for fun or for professional purposes.

However, your choice of a drawing app for Android & iOS devices depends on your digital drawing and painting skills, since there is no need to opt for an app aimed at professionals if you just want to create doodles.

Because all the features and descriptions of these apps are so clear that you will easily find your most desired app. Which of the twelve best drawing apps for Android & iOS are you going to choose? Also, inform us if you have any questions or confusion about this discussion. Leave a comment and let us know.Thank you for your time.

Source: https://www.xp-pen.com/forum-1579.html

Friday, January 22, 2021

Affordable Digital writing pad drawing Pen tablet for online teaching and distance education


Now, more and more schools, colleges and universities have shifted to distance mode, and online learning has become a new normal. And this is where newer and effective educational tools are required to make online teaching, learning and meeting more efficient and engaging.

We recognize that applications and hardware to support the equivalent of whiteboard work in an online environment are crucial for distance teaching & courses. so the teachers and students will need to have the right tools on hand, specifically Digital Graphics Pad .

eLearning and digitization are trends, every teacher should use all resources and opportunities for further training. In addition to great content, what else can you have to make your online class successful? The answer is online learning technology. By employing the best tech tools for online teaching, you can make sure your classes run smoothly every time.

Voice and Video Group Chat

Programs that offer video chat is a must when it comes to teacher interaction. Just because we are social distancing, doesn't mean we can stay connected. Some of the more popular Video Chat softwares are Zoom, Skype, Microsoft Teams, Google Meet , Google Hangouts and many more.

Zoom is high on the list because for $15/month you can have 100 participants join the host for free, and the teacher can screen share to all of them easily.

Zoom gives you the ability to communicate via video for meetings, presentations, webinars, and more.

Valuable knowledge and learning happens in team meetings, product sessions and presentations. If you record these events through Zoom, you can use them as course content in your eLearning training.

Free Live broadcast Assistant:

OBS (Open Broadcaster Software) is free and open source software for video recording and live streaming. Stream to Twitch, YouTube and many other providers ...

use OBS Studio (free software for Win or Mac) to combine the video feed from your camera and the video from your webcam into one feed

output that single OBS feed into your distance learning software (Google Meet, Zoom, etc.)

Digital Whiteboards for Teaching and Collaboration

Online whiteboards are software solutions that come along as apps or browser-based tools.They support group to collaborate visually over distance in real-time. No special software is needed for this - you and your students go to a webpage which dynamically updates as it is 'drawn' upon.

Everyone will get a digital whiteboard, where they can draw, write text, make notations on images, add math equations, and more! while all the others see what he is doing in real-time and they can interact if needed with all the content.

Online whiteboards are indeed the addition to video conferences, that takes them from pure communication to real collaborative sessions.

Instructors can share their whiteboards with the class, either allowing them to contribute to the whiteboard, or locking it for instructor use only.

Students can share whiteboards with eachother, allowing multiple parties to write on the same whiteboard.

Applications for Digital Whiteboard Work:

1. Zoom Whiteboard

Zoom has a built-in whiteboard with basic functionality; possibly best for small amounts of whiteboard work, as the ability to save/share images is limited. In Zoom it is possible to allow students to collaborate and also annotate the whiteboard, or for the instructor only to use the whiteboard.

2. AWW

AWW is a simple online whiteboard application. It gives you a large space that you can zoom in/out of, which you could break into "boards" for working on sections of problems or concepts. The free version allows downloading of pdf versions of your work with a branded watermark. AWW allows for instructor use, or to share a whiteboard with a group for real-time collaboration.

3. Miro

Miro is also an online whiteboard application that allows various levels of sharing and collaboration. you can use Miro as the whiteboard application with Zoom, as well as sharing the full whiteboard with students in real time (view only) so that you can zoom in or scroll back as needed, independent of what is being shown in Zoom.

4. OpenBoard

OpenBoard is a free and powerful digital whiteboard to quickly handwrite and demonstrate during lectures. It comes with many built in tools like rulers, drawing tools, calculators, and much more.

5. Ziteboard

Ziteboard is a cross-platform online whiteboard with realtime collaboration. You can draw with shape tools or there is an option for shape recognition. Lots of features provided. No need to install or download anything, it runs on any modern device with browsers.

6. Google Jamboard

Google Jamboard is a great tool for anyone who needs to collaborate on a whiteboard and already has a Google account. Jamboard is free and incredibly user-friendly.

it also a cross-platform with it being available on the Web, iOS and Android. After creating a Jamboard, you can share it via the built-in Google sharing system and even export a board as a PDF.

7. Microsoft Whiteboard

microsoft whiteboard allows teams to collaborate from any part of the world by logging into the Whiteboard app. Your whiteboards stay safe in the cloud until you’re ready to return to them, from the same or another device. No need to take photos of your whiteboards or mark them with “Do Not Erase.”

Users can use the Whiteboard app on the browser or download a Windows app or even an iOS app. In general, it is easy to access Microsoft Whiteboard via the web if you already have a Microsoft or Office 365 account.

Note-taking applications

The challenge of web or browser-based whiteboard programs is the time lag. This means that the letters are delayed and only half represented by the delay. The response time over the Internet is too slow. As a solution, installing and using a local program is to be essential.

Teaching Online has several products that can be used for digital whiteboard work :

Draw on PowerPoint slides: You can also annotate powerpoint slides, either blank or with initial content, and think of them as digital whiteboards. There is no built-in sharing/collaboration functionality, so PowerPoint would be best for the instructor's use.

Use MS OneNote to write by hand, draw, or sketch, either with your finger or a stylus. OneNote is perfect for lesson plans and building digital binders for students. PDF readers like Acrobat, including OneNote, can be used to annotate homework.

Xournal is a handwriting notetaking and sketching software with PDF annotation support. Written in C++ with GTK3, supporting Linux (e.g. Ubuntu, Debian, Arch, SUSE), macOS and Windows 10. Supports pen input from devices such as graphics drawing Tablets. It aims to provide superior graphical quality (subpixel resolution) and overall functionality.

Writing and Drawing in Online Presentations

There are several challenges to teaching online, and one of the most obvious to those who normally teach in the classroom or studio is how to replicate the use of blackboard or whiteboard online.

For some this will be writing, for instance maths or chemistry equations, for others it is drawing; either diagrams/graphs or something more creative.

There are several options for this issue as the teacher can use whiteboard software screen, pen-paper but it doesn’t give the same level of feel. It is very difficult to teach mathematics and any regional language on-screen by dragging a mouse.

No worries, experts got a perfect solution for teachers and students to make their education more efficient they introduced to digital writing drawing pad for online teaching and remote work (for professionals).

I would say that holding a pen ( come with graphic tablet ) is more ergonomic than a mouse. You might not feel as tense using it to draw because it is more natural of a position for your arm to be in.

A graphics tablet is a connection device for computers that enables text input similar to writing on paper. In this way, a text document opened on the computer (e.g. in OneNote) can be written directly by hand.

It also works well with other Microsoft Office software and is very compatible with Word, Excel, PowerPoint and Outlook.

There are two types of drawing tablets: screened tablets and regular. The first is on a more professional level and tend to be more expensive, you draw directly on the screen. The second, you need a monitor to see what are you drawing, it usually has some buttons on the side and a big workspace for you to use your stylus on.

Wacom is the undisputed heavyweight champ of all things tablet. The Wacom tablet is generally known to be more expensive than other brands . XP-PEN graphics tablets are certainly becoming more and more popular. They are typically much cheaper than an “equivalent” Wacom, and – on paper at least – do the same things just as well.

My first drawing tablet was a XP-Pen Deco 01, and my personal experience using them was great. It is a very affordable option for begginers artist.

XP-PEN produce a range of tablets, from around A7 up to A3 in size, with the most advance including a monitor within the tablet to allow you to actually write directly onto the screen. digital pen come with the tablet is wireless and battery-free. Prices vary from around $25.00 to upward of $800.00.

These will connect directly via USB to either PC or Mac and can use computer software such as Windows Ink Workspace to allow you to draw or write directly onto the page.

Working with a Tablet will mean one extra bit of gear to have on your desk, but the drawing experience is relatively pleasant. The more expensive version offers more sensitivity in the stylus, with more flexibility in line width and pencil angle.

At the cheaper end you get a small drawing pad and stylus, which allows you to write directly onto your screen. allowing you to effortlessly write and create digitally.

Writing with a stylus is much easier than a mouse, but it still takes some time to master. You can write into a window or whiteboard, or you can write over other programs, however the performance will vary a great deal with the software used. Generally it is easier and looks better when using sketching software rather than simply using the whiteboard in Zoom or MS Teams.

We can then share and collaborate with teachers and classmates, creating an interactive class atmosphere (even when learning remotely). The Digital Pen stylus offers the functionality of a standard mouse, meaning that you can write, edit, draw and navigate on your laptop & pc with ease.

Here, are a few Best XP-PEN Digital Writing Pad For Online Teaching and remote work (for professionals as well). It will make your online education convenient, productive. Whether you’re interested in remote teaching and learning, blended learning, the flipped classroom, or differentiating your classroom, technology is a necessity in most classrooms.

1. XP-Pen Star G640 & G430S Smallest

This is the most beautifully designed Small ultra-thin tablet for beginners which comes with a battery-free intelligent pen that can be carried anywhere without any risk of breaking. In an age of online classes, this is the most essential device used by teachers and students also used in professional webinars and conferences.

The XP-Pen Star G640 and G430S are the same tablet, just different sizes. It really just comes down to the space that you have, if you have a large area to use buy the Star g640 ( 6 x 4 inches ) but if you have a small space buy the g430S ( 4 x 3 inches ) . If you're planning on taking your Pen tablet out and about so you can tutor on the go, then you might prefer this smaller G430S or G640.

It is a compatible device with Mac and windows, supports various software’s like Photoshop, Autodesk, I, sketchbook, Microsoft Office App including MS-Word, MS- Excel, and MS- PowerPoint, online teaching software like Drool and Wizen. It is considered a good helper device for remote work & network Broadcast. This is also a supportable device with web conferencing and broadcasting software which includes Zoom Application, Microsoft-Teams, Eztalks Software webinar, XSplit application, Twitch, etc.

2. XP-Pen Deco 03 Wireless

This graphic drawing pen tablet is perfectly made with all the detailed specifications present in it. It has perfect size, shape, better touch which is appropriate to write on it . It can be easily attached with the Windows, MAC, via USB port and also by enabling wireless connect if want to attach wirelessly .

This technology has made online education more efficient and smooth, especially for teaching mathematics, scientific diagrams.No teacher can teach more smoothly and students are connecting to them properly. Not only can this but art teachers also teach their students drawings online. It is very interesting to make drawings by using a pen and pad.

3. XP-Pen Deco 01 V2

XP-PEN’s Deco 01 V2 graphic drawing pen and tablet is now known as one of the best digital writing pad. It is very convenient and portable and it also comes with 8 shortcut keys which are also customized.

It can be used for making biological diagrams, drawings while conducting online classes as it has a big active working area ( 10 x 6.25 inches ) and support pen tilt function. It can be connected with laptop, android , PC and MAC as they are compatible devices. MS-excel, PowerPoint can be easily accessed it which is beneficial in online teaching.

4. XP-Pen Artist 12 Pro

this 12inch drawing monitor is one of the most selling XP-Pen display graphic tablets which is an ideal source that helps in online education, webinars, presentations, and remote work.

One of the big pluses of the XP-Pen Artist 12 Pro is that the writing feels very natural and I thought it was much more precise than trying to write with a mouse or a finger. Also, because you are writing on the surface of the monitor you get immediate visual feedback, as opposed to needing to write on one surface and look at another monitor to see what you are writing (maybe some people can do this well, but I’m not very coordinated).

The Artist 12 Pro also includes a number of customizable buttons and a red roller wheel on left side , to minimize the need for other input devices . These buttons can be mapped to different functions based on the active software.

Online classes also include subjects like drawing, illustrations, photoshop which now can be done more efficiently by using a pen display tablet. Many creative applications are freely accessible in it. Real and natural creative drawings and illustrations can be easily made in this. It is very comfortable and smooth. Enables you to make easy corrections.

Reference: https://www.xp-pen.com/topic/detail/id/16.html

Wednesday, January 6, 2021

XP-PEN Graphics Drawing Tablet Getting Started Guide


Want to start editing your images on a dedicated tablet? This is a great way to make the process of editing more tactile and enjoyable, getting some time away from your PC or Mac screen. Professional illustrators and retouchers make frequent use of drawing tablets to help them in their work, and the best ones can even simulate different types of paper to provide a truly intuitive experience.

For those new to Graphics Tablets, and perhaps those who have never heard of them before, they are very simply put, a device for your computer that functions in the same way a mouse would. the biggest benefits are that they help speed up the workflow process and, more crucially, provide accuracy.

XP-PEN has some great tablets on the market at the moment, but even for seasoned buyers it can be a little daunting to sort out which one's best for you. We've put together this quick guide to the most popular models to help you figure out which one's the right buy.

One of the useful things about the XP-PEN Digital Pen in particular is that you can use your thumb to activate one of the two buttons on the barrel – which, as you'd expect, function much the same as a two-button mouse. You can also toggle this function between the eraser ( only support models of XP-Pen Deco 02, Artist 12 , Star G960S Plus ) at the top, but you can see what suits you, but I prefer as it is.

I'll be honest though, it took me two or three days to get the hang of using the pen and tablet for the first time. In fact I am so used to using it now that I screw my face up in horror when I have to use a mouse.

So, they are, in my eyes, the most important work tool after the computer and of course Photoshop.Using or having a art tablet is almost taken for granted, not just by re-touchers, but by photographers too. You can’t retouch as well with a mouse, no matter what direction it scrolls in.

4 tips for selecting and using your graphic tablet

1. Start Small

If you are buying a Graphics Tablet for the first time it is a good idea to start small, purchase one from the XP-Pen Star / Deco range or borrow a tablet from a friend for a while. Give yourself a few days of solid use to get the hang of it. I found a small tablet an ideal starting point when I was using a 17” monitor/laptop at home, it did the job and was fast enough to cope with the PC I attached it to.

OSU drawing tablet are fun, They are a great choice if you want to have better control than a mouse. A unique confluence of features made the XP-PEN Star G430S perfect for osu!: As the small version of the Graphics Tablet, users could navigate the screen faster than with a medium or large, but it had a bigger active area than its competitors and enough sensitivity to handle the sub-millimeter precision mapping to a gaming monitor required. The pens were light and battery-free, with a hover distance (the height above the tablet surface that it can still track the pen’s movements) of 10mm.

2. Size matters

If you are more comfortable using one of the smaller tablets and want to upgrade, or you're not fussy about starting small to gain practice – go for the largest size your desk space, monitor size and pocket can afford. Particularly if you use larger, wider monitors.

It really pays to check the tablet dimension for the active area (the area that is sensitive to the Pen stylus) and the physical tablet size, as these can differ hugely. The active area may be right but the physical size may end up being too big for you and end up cluttering your workspace, so be careful in your selection.

For example, I found the XP-Pen Deco 01 A4 Wide is ideal for the 27” iMac and a 30” Monitor on an average office desk.

3. Under pressure and full tilt!

Each tablet brand will indicate the pressure sensitivity of the tablets active area. This can range quite wildly but the more obvious point to note is the higher the number equals the greater the sensitivity. More sensitivity means a smoother experience for the user: lines and brushstrokes become more realistic, with the tablet reacting to the subtleties in pressure applied to the pen and relaying this to what you see on screen.

Ever noticed how a writing pen can change the amount of ink to paper, maybe even stop the flow of ink, the further you tilt the barrel when writing? This is gauged, in Graphics Tablet terms, by Tilt Range in either mm or degrees. This can be up to as much as 60 Degrees on the higher end models and again, as with sensitivity, the higher the number the more realistic the result will be/feel to you. These two facets should help when choosing between brands and of course price points.

4. Express Key enabled tablets make repetitive tasks more simple too

If you select a tablet that incorporates Express Keys (for example, the XP-Pen Deco 03) you can assign shortcuts so that less time is spent with the keyboard and more time is spent with your pen and tablet . This cuts the workflow time considerably.

Choose Express Keys that suit your workflow: are there functions that you use constantly such as shift, control or alt? (perhaps all these keys are used at the same time). Or a software action that you perform most such as ‘save as'? These can be instructed to function in one of the keys of your choosing. Take some time to sort what you use most and don't be afraid of them either, they are there to help and make things much speedier.

The best XP-PEN drawing tablets for artists

1. XP-PEN Deco Pro

The XP-Pen Deco Pro tablets are perfect for photographers and those working with programs like Photoshop or InDesign. The most up-to-date Deco Pro model is available in medium (11 x 6 inches) and small (9 x 5 inches ) sizes.

The Deco Pro is designed to work with Stylus PA2, and it has an impressive 8,192 levels of pressure sensitivity – so you can be extremely precise with how much pressure you want to exert. This means it's possible (and even easy) to make minuscule adjustments and get your images looking exactly the way you want them.

The pen also has been created to feel as close to a real fountain pen or pencil as possible and achieves it by providing incredible tilt response all without that irritating lag.

The tablet features customisable ExpressKeys, which you can configure to control the functions you use most, and double wheel design for intuitive control . It's sleek and portable, built with aluminium and high quality material, and it packs a lot of technology into a body that's only 2mm thick! Impressive stuff to be sure.

2. XP-PEN Deco 03

XP-Pen's Deco tablets blend style with functionality, and the XP-Pen Deco 03 wireless drawing tablet is no exception. This matt black, ultra-sleek model doesn't only look good, but also feels good to use, thanks to its well-made pen and generous drawing area.

It's well-designed in a workflow sense too, with customisable Express keys and a multi-functional dial in the top corner that allows you to set things up exactly how you want them, so you can spend less time fiddling and more time drawing.

Drawbacks? Well, you could be justified in worrying that at 8mm, the Deco 03 is a little too slim, to the point where a moment's carelessness might cause damage to it. If that doesn't worry you, this is a great buy for a good price.

3. XP-PEN Artist range

These are XP-PEN's top-class tablets, designed for professional illustrators and those who need the ultimate in image fidelity, or to work with complex systems such as 3D imaging.

The XP-Pen Artist 22R Pro drawing tablet monitor 22inch , for instance, renders images beautifully on its 1080P screen that displays 90% of the RGB colour gamut. The smaller XP-Pen Artist 12 Pro / Artist 13.3 Pro / Artist 15.6 Pro / Innovator 16 FHD still delivers this kind of optimal quality on its fully-laminated screen, while if you need your screen as large as possible, it'd be worth taking a look at the enormous 24inch XP-Pen Artist 24 Pro ( come with 2560 X 1440P QHD Resolution ).

As you'd expect, these models offer all the peninput responsiveness of other tablets in the XP-PEN series, with the same levels of pressure sensitivity when paired with the PA2. ExpressKeys can also be customised, and one-touch shortcuts can be programmed to speed up your workflow. You won't go far wrong with these excellent tablets .

Monday, November 2, 2020

Ultimate Guide to Buying a graphics tablet!


What is a graphics tablet?

The graphics tablet is probably one of the most interesting devices to connect to a computer, especially if you want to develop your creativity in the field of graphics or design. Despite its appearance very close to the tablets we use to surf the Internet, its use is completely different.

graphics tablet is also called drawing tablet, computer drawing tablet, hand-painted tablet, etc. It is a kind of computer input equipment, usually consisting of an electronic painting tablet and an electronic pressure sensitive pen. Its working mode is an electronic drawing tablet. When using it, you should connect the drawing tablet to your computer via a USB cable so that it can be powered and transfer data to your computer. The users can draw on the tablet with the attached stylus, and the image will be displayed on the computer screen. With the advantage of computer, the pen tablet can achieve more painting functions than traditional tools.

Graphics Tablets without screens require you to draw while looking at a computer screen. Animation, note-taking, practicing calligraphy, painting, and drawing are all possible on drawing tablets with screens. And the results are crystal clear and vibrant.

There is a disconnect between the conventional graphics tablet, which is essentially a slate based input device and the screen. Marry these together and you get the best of both worlds, being able to use the stylus and actually see what you draw on the built-in display.

Traditionally, graphic tablets with built-in display are expensive and only reserved for professionals. More and more graphics tablets with display have since come into the market, making them more competitively price and affordable.

use and utility

The purpose of the graphic tablet is to replace a drawing table, a pencil, a chalk or brushes and especially to simplify the life of creative people who can save or modify their work without any problem. Indeed, the graphic tablet makes it possible to transfer all the works from an "analog" workshop to a digital space.

The drawings are made directly on the graphics tablet using a stylus and displayed in real time on the computer screen. Brands are constantly developing their products so that the feel of the pen and graphic tablet is the same as that of the pencil and paper sheet. The drawings are then imported into dedicated software such as Photoshop depending on compatibility, in order to make various alterations or modifications very simply and quickly.

The graphics tablet can be used for many purposes, not just drawing: creating CAD drawings, maps, spatial and flat diagrams, processing, editing and retouching photos...

The graphics tablet, thanks to its construction and the continuous development of the software under whose control it operates, offers much greater creative freedom and precision than traditional tools. Although it is a pointing device similar to a computer mouse, the stylus and tablet offer much greater precision and freedom of work.

The graphics tablet detects pressure sensitivity and some models recognize up to 8192 pressure levels. The more levels there are, the more precise and qualitative the work will be. This detection allows to find the sensation of the pencil or brush. Devices that work with computers (there are also devices that work independently) generally use a USB, HDMI or wireless connection.

Who is the graphic tablet for?

The graphic tablet is an extremely popular device for digital graphic designers, painters, draftsmen and designers. The graphic tablet was initially reserved for professionals due to its price or the complexity of the associated software, but this is no longer the case today.

The associated software is much more numerous, intuitive or simple to use (just like graphic tablets) and the internet is full of tutorials explaining how to use the tablet and the various ways to progress. Changes that open the way for all creators and make the tablets suitable for both professionals and simple amateurs passionate about drawing for whom the graphic tablet becomes an essential medium for progress.

How to choose graphics tablet?

Here are some summaries of how graphic tablets function. These quick breakdowns should help you know what to generally look for in a tablet tailored for your needs.

1. Active work area

the graphics tablet uses absolute positioning. this means when Using the pen tablet , the movement starts from the point where you touch the pen that corresponds to the spot on the monitor, so if you place the pen in the upper right corner of the tablet's work area, the pointer immediately moves to the upper right corner of the screen, no matter what that's where the cursor was before.

Here, you should pay attention to the size of the device as well as that of the active screen area. It's easy to assume that bigger screens are always the best option.

However, this might not be true if you consider all the factors that come with purchasing a graphics tablet. Smaller tablets may just provide the right resolution for your drawing needs and they will also cost you a lesser amount compared to other bigger options.

2. Resolution

It will be much easier to choose the resolution of the graphics tablet than its size. In this case, the problem is simple: the higher the resolution, the better.

Working with a high-resolution tablet will be more pleasant, more fluid and will reproduce all curves and details with great precision. The resolution of the graphics tablet is usually given in LPI.

The resolution of the graphics tablet is given in lines per inch (lpi) and tells us how many independent lines are in every inch of the width or height of the work area. In theory, the higher the resolution, the more precisely we can work, and the more detailed our picture can be. In practice, however, we may not need the highest possible resolution at all.

Let's take a tablet with a resolution of 5080 lpi. 1 inch equals 2.54 cm. It means that on 25.4mm on the tablet there are 5080 lines which gives us 200 lines per mm. Let's assume that the thickness of our pen's stylus is 0.5mm. Then our stylus covers 100 lines and this is the precision we can work with. For comfortable work, this value must be at least 2,000 LPI.

3.Reports per Second/Points per Second

Some brands ( like XP-PEN ) document this as RPS (Reports per second) while others like Wacom document it as PPS (Points per second), but both are the same. This is simply how many times the tablet or touch device notifies the computer per second where your hand or pen is on the surface of the device. Higher/Faster the better and more responsive whereas the lower/slower the worse and less responsive. Low response tablets can create jaggy lines while high response tablets create smoother lines.

4. Pressure Sensitivity

You most likely got a tablet for something other than a mouse-alternative. And that something was probably “pressure-sensitivity”. Pressure enable's you to vary a tool's function based on how hard you press the pen to the tablet. This is the primary reason why people use tablets vs. a mouse. Pressure sensitivity simply gives you more control when using brushes, pencils and other drawing and retouching tools. A pen is also ideal for marking up and annotating documents. Basically, any function that requires a drawing or writing type movement.

Enabling control by pen pressure is accomplished differently in every application. In most cases via checkbox, button or drop down menu. The typical function is to use pressure to control the size or width of a brush, and/or it's opacity. For example, a light touch of the pen to the tablet with an increasingly heavier touch will widen a brush stroke, or make it darker. Pressure sensitivity is amazingly helpful for anyone wishing to draw and paint digitally or enhance photos.

A more accurate stylus will allow for better detail reproduction and detection of more pressure levels. Today's pens can read up to 8192 levels of pen pressure. the more pressure levels there are, the better. Some styli such as the XP-Pen Deco / Artist Line graphics tablet offer up to 8,192 pressure levels while 1024 levels are sufficient for amateur applications. The objective of the stylus is to accurately reflect your project and the final result will depend on your skills and experience but also on the capabilities of the tablet and its stylus.

5.Tilt Sensitivity

Some high end tablets come with tilt sensitivity which may also be called tilt recognition. This can be interpreted as similar to using an air brush. If you tilt the stylus you will get a thicker or thinner line due to the angle of paint spray. The standard values in which this function operates are ± 60 levels.

This is used to create natural-looking pen, brush, and eraser strokes in applications that support tilt-sensitivity. Tilt sensitivity comes into play mostly in Corel Painter or with airbrush tools used for digital painting.

6. Miscellaneous functions

Programmable Hot keys/Buttons

Basically these are extra functions on the tablet that can be convenient time savers. They allow you to program shortcuts, commands and tools into your tablet. For instance, you are painting a character, you make a mistake and want to erase. Instead of interrupting your work flow and selecting the eraser tool, you can hit a hot key with the eraser programmed into it, erase the mistake, then hit the hot key for your paint brush and continue your work.

Function Buttons may or may not come with programmable functions already set, but customizable. It depends on the tablet.

Scrollers/Wheels

These are self-explanatory. On many tablets there will be a large or two large circular devices where you can slide your finger to zoom, rotate, pan, etc., mimicking various functions of the mouse wheel in certain programs or zoom in/out and pan tools of certain programs without interrupting your work flow.

7. Induction height

It refers to the maximum distance from the board when the pressure pen can sense the model number above the tablet. The height of the induction is about 9~15mm, which is the most suitable. It is not easy to appear the focus of losting the pen as soon as picking up it during painting process.

8. Interface

By the interface we mean the way the graphics tablet connects to the computer. We distinguish wired interface: USB, and wireless: Bluetooth.

Tablets with a built-in lcd screen usually have an HDMI , USB-C or Display Port and if the tablet works as an independent workstation, it should also be equipped with WiFi and headphone output.

9. Embedded lcd screen

Graphics tablets with display can be divided into two groups: those that require connection to a computer for work, and independent workstations.

The tablet from the first group when connected to a computer will be detected by the operating system as an additional monitor. Then our tablet works as a very sensitive and precise touch screen. Thanks to the fact that you have a direct transfer of the stylus's position to what is happening on the screen, while working in the graphic program you can get the impression that you create on a piece of paper.

The second group of tablets are in fact portable computers with a touch screen. When connected to a computer, they can work just like ordinary tablets with an LCD screen. The biggest advantage of these graphics tablets is that you do not need a second computer to work with. Especially it is useful when you travel a lot and you like to create while traveling. For this reason, when choosing a tablet, it is worth paying attention to the battery life.

When choosing a graphics tablet with a built-in LCD screen, first of all, take into account the parameters of the display, such as: resolution, color reproduction, viewing angles, contrast.

Information overload, so…how do I choose one?

My advice would be to take all this into account in order to choose the best graphics tablet for you. Read reviews, compare tablets and try to tune out the brand name pushing opinions and think objectively based on your budget and needs.

If you are just starting out, you may not want to jump in with a $2,000 purchase on a Wacom Cintiq. Yet, you may very well want to start at the tip of graphics tablet pyramid. Getting familiar with what's at the top of the hierarchy in tablet technology may best suit your needs. However, you may not be able to afford anything above $100-$200 and can get the job done long as the tablet can produce certain tasks you have.

Wacom is still the best brand of drawing tablets, but keep an eye on the less expensive alternatives.Wacom still offers the best pen tablets on the market but the competition has been heating up on the past few years and now we can find good quality cheap drawing tablets from a variety of brands such as XP-PEN ( https://www.xp-pen.com ).

On the traditional pen tablets front, If you're on tight budget and cannot stretch it to the $200 range for an Intuos Pro M , take a good look at the XP-Pen Deco 03 and the Deco 01 . Both models are highly rated, offer better specs and really good hardware build quality for less than a comparable Wacom product. If your budget allows, I still think the Intuos Pro M is a better long-term investment.

Friday, September 25, 2020

XP-Pen Innovator 16 Drawing Display Tablet Review - Should You Buy One?


My XP-Pen Star 03, obviously old, has never given me problems, even till today. Having seen a few display tablets recently, I thought of upgrading my old tablet, because why not? Drawing on-screen is better than on tablet right?

I have watched and read almost all reviews about XP-Pen Innovator 16. it seem good, and much more affordable, with all that laminate screen and other nice features. And so I bought XP-Pen Innovator 16 .

Yes, it was expensive . These things cost some serious money. So prepare yourself to spend some hefty amount of money. I bought the tablet and damn that gave me the exact results I wanted. I could see the lines while I was drawing. It felt natural and a joy to draw. Finally, I could draw like I had drawn in a paper before. Seeing all the lines appear beneath my hand.

This was just awesome and totally what I needed. I was impressed, to say the least. Finally, I got the results I was missing before. Finding that joy in the drawing. It surely wasn't too much of joy with the Star 03 .

I bought it myself, this is not sponsored or whatever. I got it from XP-Pen official store , in 3 days. package is solid, you get one glove, one (no battery, autonomous) pen and the usual cables and manual. The tablet comes with a handful of different adapter options - even the weird three-prong UK one - and it’s really easy to switch them out if you’re on the go.

XP-Pen Innovator 16 Specifications:

Dimensions: 17.5” x 10” x 0.35” (WxHxD)
Screen/Draw Area: 15.6” (13.5 x 7.6 inches)
Panel Type: IPS
Resolution: 1920 x 1080
Response Time: 16.4ms
Display Input: 3-in-1 Cable
Color Gamut: 125% sRGB, 92% Adobe RGB, 88% NTSC
Brightness: 250cd/m2
Contrast: 1200:1
Resolution: 5080 lpi
Viewing Angle: 178°
Aspect Ratio: 16:9
Number of Colors: 16.7 million
Pressure Sensitivity: 8192 levels
Tilt Support: 60 degrees
Data Rate: Max ≥ 220RPS
Function Keys: 8, user assignable
Two Wheels: 2, user assignable
Compatibility: Windows 10/8/7, macOS 10.10 and higher
More details from Official Site : https://www.xp-pen.com/product/638.html

Design and Build

The XP-Pen Innovator 16 is in the middle ground of the company's five size ( 11.6" , 13.3" . 15.6", 21.5" , 23.8" ) pen displays. At 3.6 pounds and significantly less than an inch thick, the 15.6 inch display and integrated pen tablet is also the one of the three size (11.6" , 13.3" . 15.6" ) that's small and light enough to pick up off the desk and work with right on your lap. With a thickness of just 9mm thick, it's thinner than all but the most svelte notebook computers.

Unlike the larger 22 and 24 inch versions, which come by default with conventional LCD monitor stands, the Innovator 16 uses an all plastic stand to support the display at the angle of 20 degrees.

It needs to be hooked up to a laptop or desktop, and needs to be plugged-in. The XP-Pen Innovator 16 uses a clever tri-cable to make this as simple as possible. There's a proprietary socket on the side of the tablet, in which a cable plugs that splits off into three wires – one to hook up to an HDMI port on your computer of choice , another to a USB and a third to the power.

The display side of things is driven via HDMI output, with a single USB connection controlling the input side ( acts as an interface for the digitiser pen ) . Power also can routed through the Innovator 16's video controller as well, so you can work with it without Plug in power .

I think the notable advantage of Innovator 16 is that you don't need any electric outlet to activate it if your computer/laptop is powerful enough to run the tablet through plugging to your PC/laptop alone.

The 1.8 meters cord tethering the display panel to the video controller gives you the ability to work with the Innovator 16 at a pretty decent distance from your desk – great for sketching with the display on your lap.

you will get 8 Shortcut Keys and a two function wheel ( roller and touch ), all of which can be configured with the driver software.

Nice and lightweight display

The main attraction on the Innovator 16 is easily the display panel. The screen measures 15.6 inches with a resolution of 1,920 x 1,080 for full HD viewing at a smidge over 196 pixels per inch. Wrangling 92 percent of Adobe's RGB gamut, the panel sorts 16.7 million colors and offers 250 cd/m2 of brightness.

In practice, 15.6inch size means more zooming in and out when dealing with minute details. Then, there is the small screen size that many consumers state that it interferes with cursor movements along the edges. A larger screen would work well especially for drawings.

The active matrix panel has a brightness of 250cd/m2, "Semi-gloss" probably describes the surface best as it provides just the right amount of sheen without tossing back too many reflections from outside lighting.

It possesses over 16.7 color variations. This means that the user has 256 color tones to work with. and its response time is a generally smear-free 16.4ms. Coupled with the 16:9 aspect ratio, the colors bring to life any drawing done on the graphics tablet.

The color accuracy is pretty spot on for those who really need it to be accurate, the 92% Adobe RGB can satisfy for your needs.

A 178-degree angle of view and its flip-out stand means it can be used on your lap or tilted at 25-degrees on a desk for a more impact-full display but without to many glitches as it is still usable at that angle.

It uses an IPS panel, fitted with a matt screen protector , a natural choice for a product like this.

new Innovator 16 has a laminated display, The point of laminate is that there is no gap, and you feel like you draw where you put your pen at. From an angle I do see a ever so slightly gap between the glass and digitizer. So it's largely an aesthetic thing, but I also think it makes using the pencil feel more authentic. Like you're actually drawing on glass instead of making inputs to a computer under the glass.

As a display designed specifically for visual artists, its quality is far superior to that of any notebook display I've seen. It has true 24-bit color depth (as opposed to the fudged "millions of colors" on standard notebook displays). Colors, brightness, and contrast are even across the face of the screen. And the device calibrates up nicely using a colorimeter.

Digitiser and Stylus

the stylus is batteryless, the tablet provides 8,192 levels of pressure sensitivity and a tilt of up to 60 degrees . As with all of XP-PEN's higher-end tablets, you can expect an excellent and highly naturalistic pen-like response from the Innovator 16 .

Hand movements translate into pen movements, which transmit onto the screen via electromagnetic resonance technology. The 8192 pressure sensitivity levels enable the digital pen to work seamlessly and without friction on the surface. The pen simply glides over the surface allowing the creation of flawless fine lines.

The digital pen achieves a co-ordination accuracy of up to plus or minus 0.01 inch . This means that the possibility of errors during input is minimal and by just 0.01 inch. This factor is important in enabling near perfect input in order to achieve flawless digital images on the screen.

The Innovator 16 graphics tablet tilt sensitivity of plus or minus 60 degrees allows the user to achieve tilt angles quickly and accurately. A reading height of 10mm or more is possible from the cover plate at any screen angle.

Pen tips are removable/replaceable, and XP-PEN supplies several of the default tips. The pen has excellent button quality and the buttons are nicely placed. Making them easy to use.

While the all-plastic pen would actually be slightly more comfortable, in my opinion, it was a bit on the heavy side. The contoured grip area is thick enough to promote good pen holding habits (and reduce long-term fatigue). The rubberized finish on the grip area has about the right amount of give and a nice, easy to hold texture.

Setting Up the Innovator 16

Installation is easy, remember to NOT plug it in before wipping clean any other tablet drivers. Don't even plug it while the AC is off, as your OS will detect it anyway and try to install stuff.

Clean any other brand's file, install the latest XP-Pen drivers, and then turn on the tablet. remember that you need navigate to XP-PEN's website to snag the driver software .

The calibration tool is pretty easy to use, and there's a menu accessible via a button above the tablet for the colors, brightness and contrast. Everything looked fine to me when I first booted it up, but you can fine tune it easily.

In terms of driver software, like all XP-PEN tablets you get a broad range of controls over the tablet and pen behaviours. Including sensitivity, adjustments, for pen tip "feel", tilt sensitivity and assigning controls to any of the buttons or modifier HotKeys.

Top product features

One of the best features of this product is the 8 express keys and two wheels design . These features enable the convenience in switching keyboard shortcuts and mouse clicks. They aid in zooming and scrolling.

Individual configuration preferences enable a user to change and alter the controls according to his or her liking. This versatility ensures full control on connection options and device function keys and touch wheel .

XP-PEN supplies software combination bundle to select like ArtRage 5 or openCanvas which is great for drawing and sketching .

In Use

Simply pick up the display or set it in your lap and you're ready to draw. If you're used to working on an angled drawing or drafting table, the Innovator 16 easily goes there too, and its this kind of choose-your-own-adventure flexibility in setting up and using the Innovator 16 that makes it so appealing.

It supports Mac OS X, Windows PCs and Linux devices .It's compatible with all applications, and all major graphics applications have built-in support for the tablet's advanced functionality. including professional software such as Photoshop and Illustrator . It works transparently and is completely plug-n-play.

Graphics work on the 15.6inch Innovator 16 may require more zooming than you're used to on a 20+ inch monitor to make out and manipulate the fine detail rendered by larger, higher-res displays.

With on-tablet programmable buttons and touch & roller wheel that are easy enough to set up for dedicated zooming and scrolling , this isn't as much of an inconvenience as it first seems, and the process quickly becomes second nature.

It takes some getting used to but is worth the effort since it really speeds up workflow. You can zoom in or out of an image in Photoshop / GIMP or, for those more into video production.

This makes the Innovator 16 a joy to use for photographic and retouching work. Display your image on the main monitor, then use the Innovator 16 and its 8 programmable buttons and Touch wheel to touch up the details, while keeping an eye on what effect your changes are having on the overall image. I find that I very seldom need to go back to the keyboard when doing normal editing.

Likewise for jumping back and forth between the XP-PEN and another display: once you figure out how the Innovator 16 behaves in “mouse” versus “pen” mode, reaching across to the primary display to grab work items or select files makes perfect sense.

Because the pen is pressure sensitive, it's very easy and intuitive to use for making selections or painting. With 8,192 levels of pressure sensitivity, it's possible to make anything from the most finessed of pen strokes to the broadest brush sweeps, and the resolution of 5,080dpi makes the Innovator 16 highly accurate.

The colours on the tablet are very vivid and satisfying to look at, The grip on the pen is really good, and the pen itself is very smooth on the screen (smooth and satisfying tbh). Drawing on the screen is a dream – it's responsive, precise, and with practice it's possible to generate some spectacular results. It's sensitive to the tilt of the pen as well, making drawing as realistic as it can be.

The difference is clear from the very first time you fire up Corel Painter or Photoshop. The pen smoothly reacts to your actions like it would in the real world. The only thing you will miss is the drag of the actual pencil or pastel on paper.

Conclusion

If you work with graphics or images, the concept behind the XP-Pen Innovator or Artist series seems like a no-brainer: Combine a display with a pressure-sensitive tablet so that you can directly edit vector art, retouch images, paint, produce video special effects, and so on. True, tablets aren't for everyone. If you work with a tablet now, you'll probably find a XP-Pen Innovator even more fluid and powerful. Drawing directly onscreen helps to improve your accuracy, especially for tricky selections and masking operations.

XP-PEN's Innovator 16 combines the best of its screenless range of graphics tablets with interactive display technology in a portable format that is both flexible and great to use. As anyone who has used a graphics pad will tell you, once you've got one there's no going back, well now after trying one of these, your old non-screen will be left gathering dust.

In short the XP-Pen Innovator 16 is a serious tool with some serious benefits. For the professional designer the pay off period is very short and the question of whether to purchase is a no brainer. For the student it is a good investment for the future and will certainly prove its worth ($499 USD).

You can Get it from United States & Canada official Store: https://www.storexppen.com/buy/innovator-display-16.html , If you live in other regions you can select from official site “Store” List.

What we liked:

Unparalleled digital drawing experience
Excellent build quality
Top quality display
Excellent Portability
Low Price Point
Lots of supported software
Many buttons and wheels
Super flexible software for configuration

What could be improved:

Cord can become annoying while rotating the tablet

Update to a USB-C cable

Saturday, August 15, 2020

Shop the 2020 XP-PEN 15th Anniversary Sale: Cheap Digital Art Tablet Deals & Discounts

you may want to treat yourself or the budding artist/illustrator/animator/Photographer/designer in your life to something special! You can't go wrong with graphic drawing tablets!

Whether you are looking for a graphic tablet to take your first step in digital art or a powerful pen display for your job, you can always look to XP-PEN to offer you elegant and reliable products no matter the use case.

Ever since XP-PEN was founded in Japan in 2005, XP-PEN has always striven to provide users all around the world with digital tablets that are reliable and user-friendly, and they have continued to be a leader in releasing quality tablets at affordable prices.

It's that special time of year again for XP-PEN fans: The 2020 XP-PEN 15th Anniversary Sale is here. The brand's annual shopping event -- XP-PEN's biggest sale aside from the Black Friday, Cyber Monday, Christmas Holiday.

so there will be a big promotion on XP-PEN's official stores. Almost every model of XP-PEN tablet is now having up to 30% discount. There have no doubt that this year's sale will be just as exciting as in years past.

If you're ready to upgrade your old pair of art tablets for some fresh kicks, then August 15–September 14 is your lucky time. The Anniversary special Sale giving you the chance to do just that. Thanks to this event, there's a slew of incredible discounts on a wide selection of popular xp-pen drawing tablets , making for the perfect opportunity to snag a new pair of tablets on the cheap (and perhaps shop the best active deals while you're at it).

Don't miss the chance to buy brand new merchandise at a discounted rate from xp-pen brands like Deco 01 , Artist 12 Pro , Artist 15.6 Pro, The Artist 24 Pro, and more. Keep reading this guide for everything you need to know about this epic sale event.

What is the XP-PEN Anniversary Sale?

XP-PEN sure knows how to throw itself one hell of a birthday party. Every Mid-August to Mid-September , XP-PEN celebrates with a can't-miss super sale on graphics art pads , accessories, pen display monitors and more.

As per usual, you can expect the Anniversary Sale to feature new product's Anniversary Edition ( Deco mini4 , Deco MINI7 , Innovator 16 for this year ) at great prices.

When is the XP-PEN Anniversary Sale 2020 ?

this big shopping event of the year dates are from August 15 through September 14 . the sale opens to the general public on August 15 .

Do I need a promo code for the sale?

No. There is no promo code required. The sale is available to all customers .

Should I shop in-store or online?

only support shopping online . In addition to free shipping and free returns, XP-PEN also offers expedited shipping and even international shipping.

Does other regions and countries have Anniversary sales?

official store of other regions and countries also offer the widest range of discounted products for their Anniversary sales events . you can visit different online store by click the link at the end of this guide or click the " store " button in the XP-PEN Official Site to chose your regions and countries .

What is the Anniversary Edition Tablets?

To celebrate their anniversary, XP-PEN is launching with 3 anniversary edition tablets with custom anniversary packaging and extra goodies included.

The anniversary edition tablets are: the new Deco Mini 4, Deco Mini 7, and Innovator 16 tablets.

The extra goodies included are: An exclusive XP-PEN branded ink pen, a keychain and stickers of XP-PEN's mascot Fenix, and postcards with illustrations of Fenix visiting iconic places around the world.

Every year, shoppers plan ahead for this sale, and rightfully so. They have to, considering how fast everything tends to sell out. Once you find a piece that sparks joy within your soul, you have to claim it before someone else does. You won't regret it either, since you won't find a better deal!

Any frequent XP-PEN shopper knows the Anniversary Sale is one of its biggest and most popular events of the year — it's the best time to score some of the most amazing savings at the online store. But in case you're unfamiliar, we're here to give you all the details. The one-month-long event typically offers majorly discounted prices on all of fashion and useful items.

Take a look at some of XP-PEN USA & Canada Store deals below:

Drawing directly onto the XP-PEN Artist series screen removes any mental disconnect you may encounter when drawing on a tablet while looking at a separate screen.

These are great quality machines, newest model's fully laminated screens reduce Parallax and reflections , Support pen tilt & pressure function while providing a natural, pen on paper feel as you draw.

Innovator 16 Anniversary Edition (was $549.99, 27% off)
Innovator 16 (was $499.99, 20% off)
Artist 12 Pro (was $299.99, 20% off)
Artist 15.6 Pro (was $449.99, 20% off)
Artist 13.3 Pro (was $349.99, 20% off)
Artist 24 Pro (was $899.99, 20% off)
Artist 22R Pro (was $699.99, 20% off)
Artist 12 (was $249.99, 20% off)
Artist 22E Pro (was $529.99, 20% off)
Artist 22 Pro (was $499.99, 20% off)
Artist 15.6 (was $349.99, 20% off)

If you're after a quality drawing tablet but are on a budget, or aren't bothered about drawing directly onto a screen, the XP-PEN Deco Series and Deco Pro are great options. Simply connect this nifty but affordable device to your Mac or Windows PC with USB or built-in wireless Kit ( Deco 03 ) , install drivers, and you're ready to start work directly in the software of your choice.

Deco Mini 7 Anniversary Edition(was $59.99, 30% off)
Deco Mini 4 Anniversary Edition(was $49.99, 30% off)
Deco Mini 7(was $39.99, 20% off)
Deco Mini 4(was $31.99, 20% off)
Deco 01 V2(was $79.99, 20% off)
Deco Pro M(was $139.99, 20% off)
Deco Pro S(was $109.99, 20% off)
Deco 02(was $89.99, 20% off)
Deco 03(was $109.99, 20% off)
Deco 01(was $69.99, 20% off)

The XP-PEN Star Series products is the perfect entry-level pen tablet for anyone getting started with digital art or image editing. But the pressure sensitivity levels Still reach 8192 levels , the stylus is battery-free , no recharge needed. Perfect for photographers, re-touchers or any designer looking for the creative control and comfort of the digital pen .

Star Star G960S (was $69.99, 20% off)
Star G960S Plus(was $79.99, 20% off)
Star 06(was $89.99, 20% off)
Star 05 (was $79.99, 20% off)
Star 03(was $69.99, 20% off)
Star G640S (was $49.99, 10% off)
Star G640 (was $39.99, 10% off)
Star G430S(was $29.99, 20% off)

Other Two English official Store List:

XP-PEN Australia Store

XP-PEN United Kingdom Store